1.5 Release Implementation Guide
This guide provides a valuable resource for implementers who want to understand some of the key software changes that have been incorporated in the 1.5 release. It does not detail all of the new features and improvements in the 1.5 Release but specifically details those new features and improvements that will require specific setup steps to be performed post the 1.5 upgrade.
In some instances the notes relate to significant changes in look and feel that may require additional user training.
The documentation is structured as a page per significant feature or improvement.
Customer Alerts
The customer notes area in OpenVPMS has been modified to split notes into notes and alerts. This was done to allow more detailed display of customer alert information in the customer summary section as well as to make customer alerts work the same way as patient alerts. These changes are detailed in the following JIRA request and you can see an example of the new customer summary display in this screenshot.
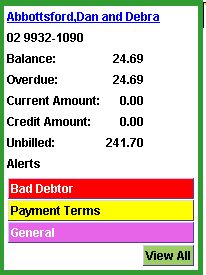
The previous Alert button has been replaced with specific coloured and prioritised buttons which can can clicked to get more detailed information. These alerts are also displayed while creating and editing appointments.
During the upgrade to 1.5 the database update script finds all the Customer Note Category lookups that are associated with Customer Notes that have the Alert flag ticked and then creates new Customer Alert lookups for these. The lookups have their Priority field set to High and their Colour set to Red. It then migrates all the existing Customer Notes that have alerts to be Customer Alerts and deletes them from the Notes.
In order to setup the colours and priorities of these new Customer Alert Type lookups you need to go into Administration -> Lookups and edit the newly created lookups to your desired settings.
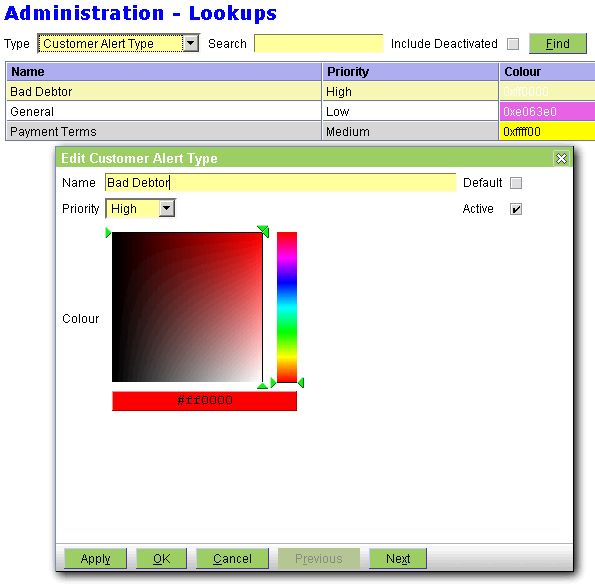
You are of course free to add additional Customer Alert Types.
From a user perspective they will need to told that they need to now make a decision in Customer -> Notes & Alerts which they will create. Only alerts will be displayed in the customer summary and new appointment screens.
Patient Alerts
In conjunction with the Customer Alert changes noted previously, release 1.5 has made some changes to the existing Patient Alerts feature.
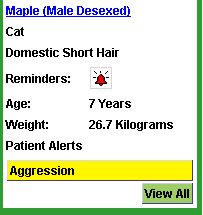
The previous Alert button has been replaced with specific coloured and prioritised buttons which can can clicked to get more detailed information. These alerts are also displayed while creating and editing appointments.
From a implementation perspective the only required task is to modify the existing Patient Alert Types to set their colour and priority. Again this is done in Administration -> Lookups as was the case with Customer Alert Types.
From a users perspective little changes except they do not need to click the Alerts button anymore.
Default View Highlight
You can set the default highlight for specific Schedule and Work List views as per Jira Entry.
To setup the default highlight edit the Schedule or Work List view from Administration -> Organisation as shown in this screen shot.

Templates
There are a number of template changes that effect general printing and the behaviour of printing.
Print Copies
Wherever you see an interactive print dialog in OpenVPMS you will now notice a Copies selector.

You can set the default copies for any specific template in the Administration -> templates workspace using the new Copies field.

If the Template Printer is setup to be interactive you will get a chance to modify this at the time of printing. If not then this will be the number of copies that will be printed automatically.
Preferred Print Mode
A new template option now allows you to control how printing certain templates behave during checkout and also when documents are created during invoicing certain products.
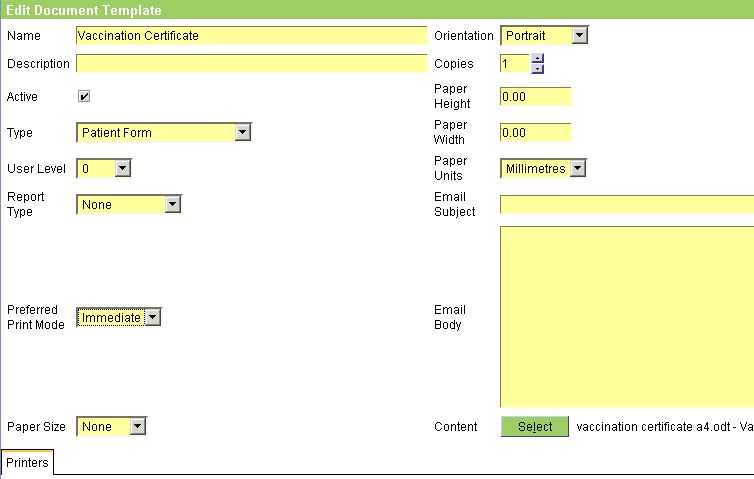
The new Preferred Print Mode field allows control over whether documents are printed immedaitely when created during charging, are printed at check-out or only printed manually.
The following outlines the behaviour of the three options.
Immediate. The document will be printed immedaitely when invoice is saved. If the template is set to interactive then it will prompt with the standard printer dialog which you can Skip if required. If you Skip the document will then be presented at check-out.
Checkout. The document will be presented at Check-out using the standard check-out printing dialog and will be automatically ticked. This is the default settings as this is the behaviour for all previous releases.
Manual. The document will not be printed immediately and will be presented at Check-out by unticked. Typcailly for forms that the user wishes to manually print or only occassionally print at check-out.
Interactive Reminders
Reminder Types and Product Reminder Links can now be set to display a new reminder dialog when reminders are generated through charging.
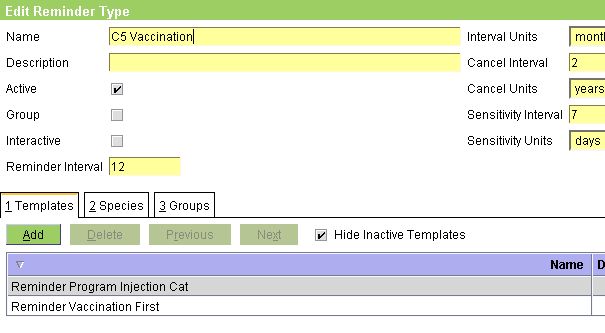
The Reminder Type Interactive flag is used as the default for any new Product Reminder interactive settings. That is if you link a reminder to a product the setting for Interactive for the link will be determined by the setting in the Reminder Type. This will not effect existing links just any new links created.
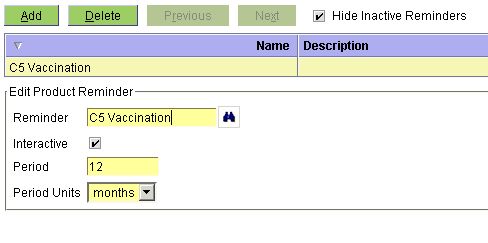
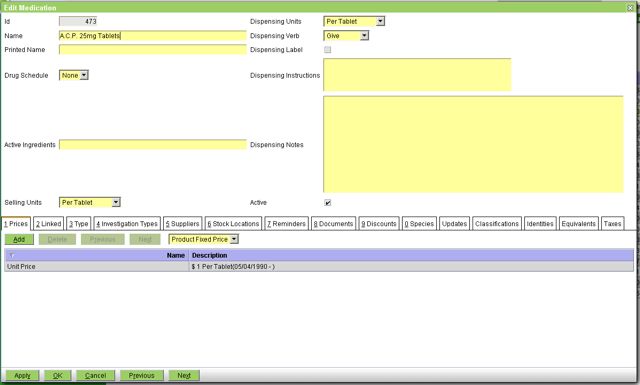
In the product you can nominate whether you want a specific reminder to be interactive or not overriding the original setting in the reminder type.
The default setting in non interactive so, from an implementers perspective, you will only need to modify those products that have reminder type links that you want to change to be interactive.
When set to interactive the users will get a new reminder dialog appear when they select the product with the default due date set to the interval defined for the product. They can accept or override this date.
Medical Records Improvements
By far the most significant User Interface and operational changes is Medical Records editing. These changes will be evident in the Patient ->Medical Records and the Check-In and Consult workflows. The changes are described in detail in the Direct Editing and Streamline Visits Item JIRA's.
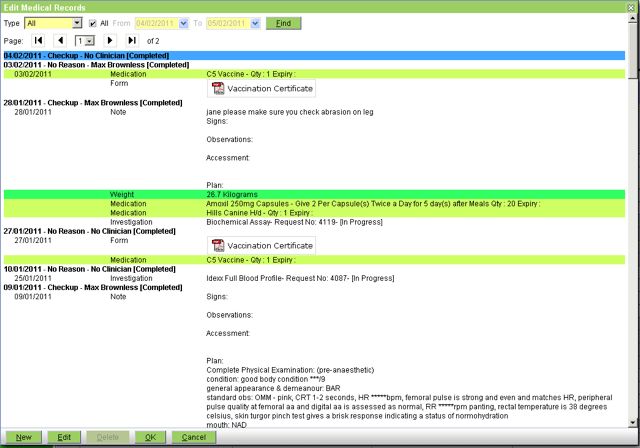
This screen shot shows you the Consult workflow initial Edit Medical Records dialog. You will note the screen is actually the summary medical records screen and you can do all the normal filtering, scrolling and reviewing functions on this screen as you would do in the Patients - >Medical Records summary page.
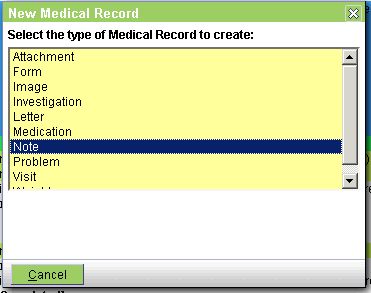
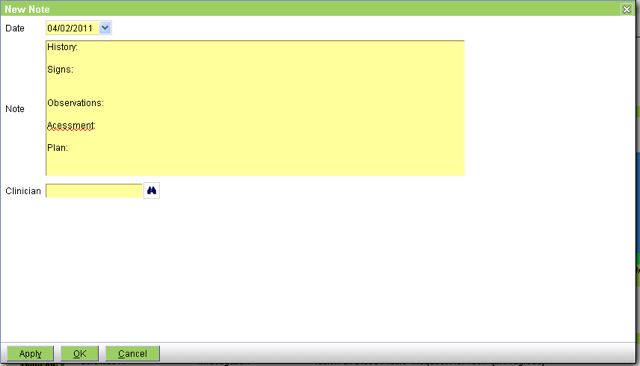
If you want to add a new entry just click on the New button and the following New Medical Record dialog will appear with the default entry being a Note.
When you want to edit a specific medical record entry there is now no longer a need to select the appropriate visit, click Edit and then select the visit item to edit from the table (i.e note, investigation etc). Just double click on the entry on the summary screen and a edit dialog will appear as is shown below for a note.
All of these changes are designed to streamline editing Medical Records and to circumvent the locking issues when check-out and medical records editing happened simultaneously.
Charging Improvements
Although there are no new charging configuration options there has been a number of significant improvements to charging. These are primarily designed to streamline the charging and are outlined in this JIRA.
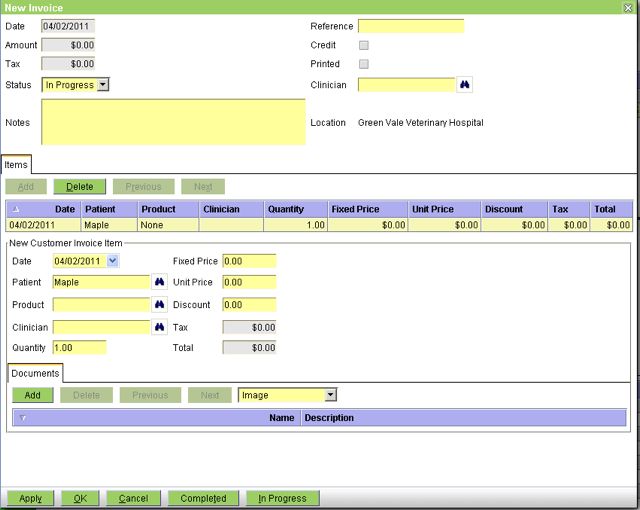
On entering the new invoice you will first notice that a new invoice entry has automatically been added and is ready to enter the patient or product.
You will note the additional buttons at the bottom of the invoice dialog. These allow you to save the invoice and simultaneously set the invoice to the desired status, Completed or In progress. The Ok button is still available allowing you save as normal leaving the status unchanged.
Next and Previous buttons and keyboard shortcuts have been added to allow you to easily move between invoice entries.
The Add button is disabled when you have a invoice entry that has not been completed (No Patient and/or Product selected).
Previously if you tried to Save the invoice and there was a entry without a Patient and/or Product you would get a validation error and have to enter the information or delete the entry. These entries are now automatically removed.
Macro Improvements
A popup Macro selector has been implemented as per this JIRA.
Also Macros can be used in Letter input fields as per this JIRA.
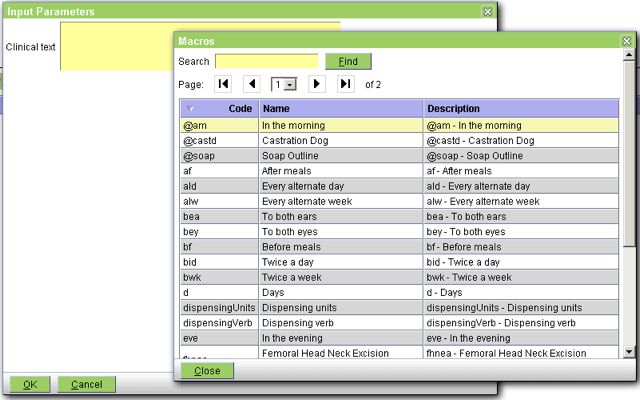
The Macro screen can be displayed in any text box field using the Alt-M keyboard shortcut.
Workspace Improvements
A number of workspaces in OpenVPMS have been changed to streamline bulk editing and viewing. These changes are detailed in this JIRA.
The workspaces that have changed are:
- Products -> Information
- Administration -> Organisation
- Administration -> Types
- Administration -> Lookups
- Administration -> Templates
- Administration -> Users
- Administration -> Roles
The idea is to allow the user to create a list then work from that list to edit the individual items. This is contrary to the current situation where selection of a product etc is done through the SELECT button. This means that the list dissapears after a selection is made and needs to be re created to make another selection. Here is an example using the Product -> Information workspace.

Double clicking on any table entry will automatically take you to a standard edit dialog for that entry as shown below.
You will note there are two(2) new buttons on the bottom of the dialog, Next and Previous. These allow you to move backwards and forwards through the previous filtered list making performing mass editing or viewing of details significantly easier.
Selection Ok or Cancel on the edit dialog will return you to the filtered list either saving or cancelling any changes made on that record respectively.
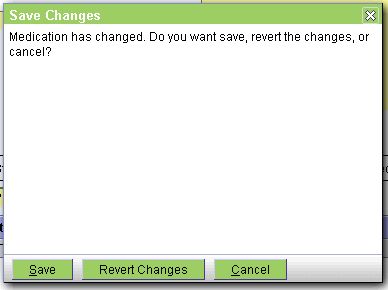
Should you edit something and not Apply the change before using the Next or Previous buttons the following dialog will appear giving you the option to Save, Revert or Cancel.
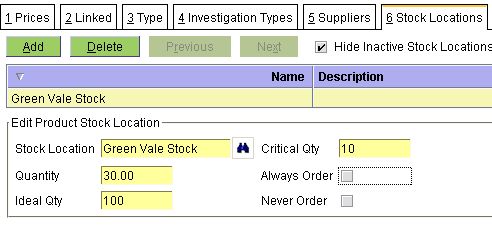
Stock Control Improvements
Stock control has been improved by allowing stock reordering preferences to be setup against specific products and stock locations as per this JIRA.
This in conjunction with a new Stock Reorder report can be used to generate a report of products that need reordering. This new report can be found in the Shared Resources area here.
Electronic Ordering and Deliveries
The OpenVPMS components of first release of the ESCI (Electronic Supply Chain Interface) project are included in version 1.5. In summary this includes the ability to send Orders electronically, receive electronic confirmation from the supplier that the Order was received, and receive electronic Delivery/Invoice information from the supplier.
In order to take advantage of these new features your current supplier needs to implement a set of standard ESCI services. Many Australian suppliers are in the process of developing these based on documentation and tools the ESCI project has already provided. When implementing these services you will work closely with your supplier to configure OpenVPMS for these electronic services.
From a practice and a user perspective the process is quite straight forward.
When you create an order and the supplier for the order is configured to send electronically, when the order is Finalised it will automatically sent to the supplier electronically.

If this is successful then a dialog will be displayed otherwise if connection cannot be made or there is an error in the order an error message will be displayed and the Order will remain In Progress.

You would have noticed in the Order screen shot above a new button Check Inbox. This button is available in both the Supplier ->Orders and Supplier -> Deliveries workspaces. This button will check all suppliers which are configured for electronic communications in your system and look for electronic Order Responses or Deliveries. It will process any found and generate messages in the Workflow -> Messages workspace as shown below.

When the supplier has processed the Order you will receive an Order Accepted or Order Rejected message and it will be linked to the details of the Order it relates to as shown above. The status of the Order in the Supplier -> Orders workspace will be modified accordingly.
The Order Invoiced message tells you you have received an Delivery notification. The details of the delivery are attached. Deliveries can be for one or more full or partial orders or not associated with a order at all.
You will find the received electronic Delivery in the Suppliers -> Deliveries workspace marked as In progress. You can then confirm this against the actual physical delivery and modify and Finalise as appropriate. On finalising stock and any price updates will occur.
From an OpenVPMS implementation perspective in order for OpenVPMS and the supplier to successfully interact electronically any Product Supplier information needs to include enough information for the supplier and OpenVPMS to understand which product is being ordered and correctly ascertain the number being ordered or delivered. In order to do this it is imperative that each product supplier has key supplier reorder information and the correct package description and units.

From an ordering perspective this provides the supplier with a product code they can recognise and the type of package and size you are after.
From an delivery perspective it allows OpenVPMS to ascertain the product being delivered and how to update the stock levels correctly for the number of selling units delivered. this is especially important if the Delivery is not associated with an electronic Order. i.e. a phone order where you are receiving an electronic delivery notification.
We suggest you work closely with your supplier(s) to implement these new features.
Patient Age Improvements
In the previous version the format of the patient age display in the Patient summary panel and the Patient Information screen was hard coded into the application. This release allows you to customise this to suit your practice needs.
Also the patient age at the time of each visit displayed in the Medical Record summary tab is now shown next to the visit details.
In order to customise the display you need to create a Duration Formats lookup in Administration -> Lookups and associate one or more Duration Format lookups to it as shown is this screen shot.
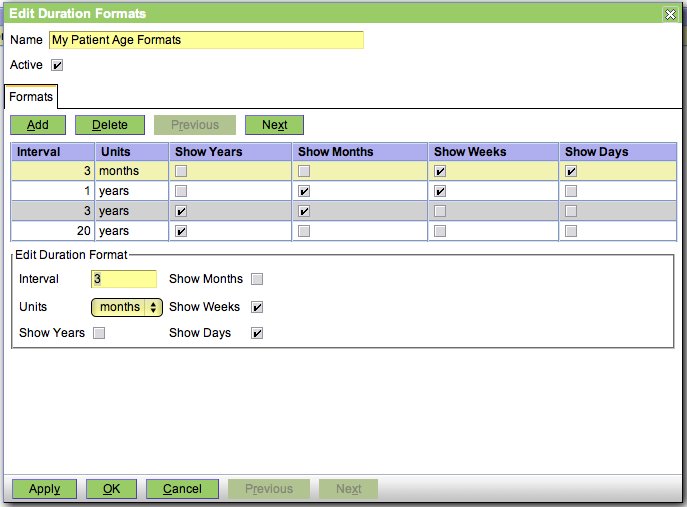
Each Duration Format shown in the list tells OpenVPMS whether to show years, months, weeks or days for any age up to and including the interval and units selected. It doesn't matter in what order you add the formats as OpenVPMS will order by ascending interval and select the first interval it finds that is greater than or equal to the patients age.
In the above example this means patients aged up to 3 months old will display in weeks and days, patients greater than 3 months old and up to 1 year old will display in months and weeks, patients greater than 1 year old and up to 3 years old will display in years and months, and patients greater than 3 years old will display in years only.
Although typically you wouldn't create more than one Duration Formats lookup you can and then you can select which one to utilise by associating with the Practice in Administration -> Organisation as shown in this screen shot.

Once a duration formats lookup is associated with the practice that format will be used to display patient ages. If no Format is specified in the Practice (the default) then the internal default patient age formatting is used (as per version 1.4 and prior).
SMS Features
This release includes the ability to generate SMS messages from the Customer summary panel and when viewing Contacts in the Customer Information workspace as shown below.
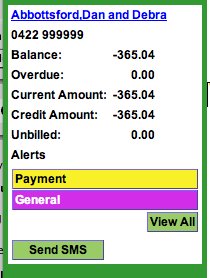
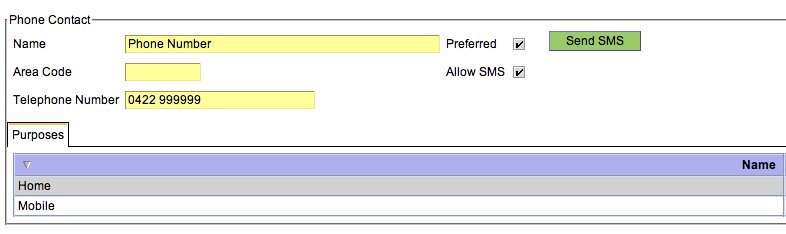
The Send SMS button will only appear if the SMS configuration has been completed as described below and the Customer has one or more phone contacts that have the Allow SMS flag ticked.
When the Send SMS button is clicked a dialog is dsiplayed allowing you to enter an SMS message and also, if there are more than one phone contacts that can SMS, allow syou to select the contact to use from a drop down list.
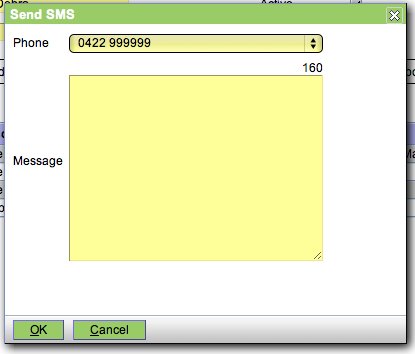
Please note the SMS mesage field displasy the number of charaters remaining in the message up to the limit of 160. You are free to utilise macros in the message field. Also implemented are some new macro tags which will allow you to automatically display customer and patient details. For example the following macro
concat('This is a test message to ', openvpms:get($customer,'name'), ' about their pet ', openvpms:get($patient,'name'))
will display
This is a message to Abbotsford, Dan and Debra about their pet Maple.You can use this feature to create many standard message macros suitable for your own practice.
SMS Configuration
OpenVPMS uses email to send SMS's so the selection of SMS provider is restricted to those providers that provide an Email to SMS gateway service. Fortunately most providers do provide this service so your choice is large allowing to shop on service and price rather than being restricted to one or only a few SMS providers.
In this release we have provided three(3) different SMS configuration options. Two(2) of these are for popular SMS providers, SMMSGlobal and Clickatell. The third configuration option is Generic and can be used for nearly any other SMS provider.
You will need to sign up with an SMS provider and setup your account and specific preferences with them before configuring OpenVPMS. Each provider will have their own specific setup requirements.
To add a SMS configuration firstly goto Administration -> Organisation and click New and select the appropriate SMS configuration option from the list.
SMS Global
The SMS Global configuration screen is shown below.

Country Prefix: This will be added to the front of the number to internationalise it.
Area Prefix: This will be removed from the front f the number to internationalise it.
From: Must match the sending email address settings when you setup email preferences in your SMS Global account. You can restrict which email address can initiate sending SMS's in the SMS Global account preferences on the SMS Global web site. Within these settinsg you can also stipulate if any SMS replies are sent to the sending or another email address.
Clickatell
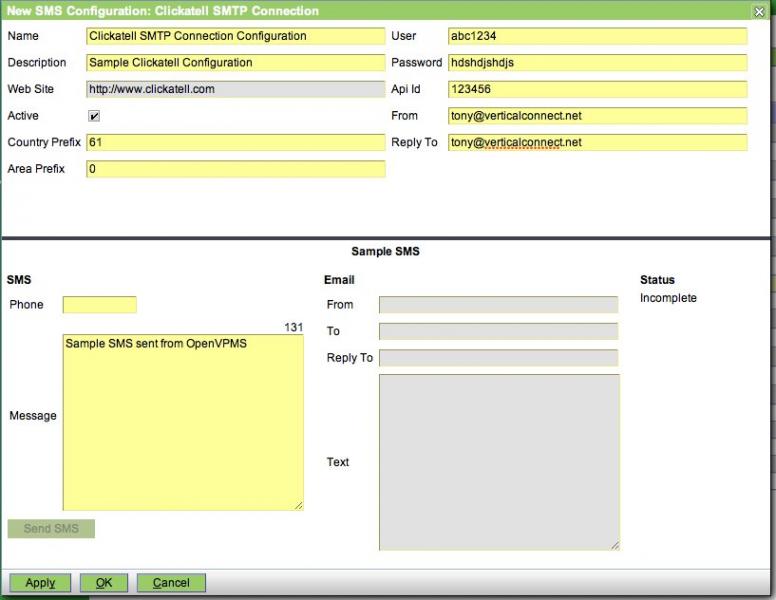
Clickatell has a more detailed configuration and is generally more secure as users need to know a few more details in order to send SMS's through their account.
User Id: Your Clickatell account user id.
Password: Your Clickatell account password.
API Id: Provide when you create account.
From: The from addres Clickatell require.
Reply To: The address any SMS responses are sent to.
Generic

The setup of the generic SMS configuration is beyond the scope of ths document. We suggest you utilise the Implementers forums to request any information about setting up the Generic SMS configuration for your SMS provider.
Note: In each of the configuration screens you have a test section which allows you to test the setup by entering a telephone number and message to send and clicking Send SMS. We suggest you use this to test both the SMS configuration and succesful receipt of email responses.
Practice Setup
Once you have created your specific SMS configuration you need to link it to the Practice as per this screen shot.
