Deliveries
This screen displays the deliveries and returns for the selected supplier and stock location. Initially the screen looks as follows:

The top part of the screen is a standard select screen. Enter the required Supplier and Stock Location. You can select one of the following statuses: All, Cancelled, In Progress or Posted.
After finding orders, and selecting an order and a line item the screen looks as follows:

For details on the fields in the header and the Items tab, see Edit Delivery.
For details on the fields in the Order tab, see Edit Order.
For a Posted delivery the buttons are as follows:
New - create a new delivery or return
Invoice - create the invoice for this delivery. The delivery status will be set to Posted. Note that you will not be able to do any more changes to this delivery, and the system will not object if you have only had a part delivery (eg 3 items delivered out of 6 ordered) - because what you are doing is creating the invoice for the part delivery. Note that the invoice is normally created as the second step of the Finalise process - see below.
Reverse - create a return note to reverse the selected delivery - a confirm window will be displayed
Check Inbox - pressing this checks to see if there are any messages from the ESCI interface, and if so sets the red 'have messages' alert in the messages icon at the top left of the screen. If the alert comes on, then you can use Workflow|Messaging to examine the messages.
For an 'In Progress' delivery, the buttons are New and Check Inbox and also:
Edit - edit the delivery
Delete - delete the delivery/return - a confirm window will be displayed
Finalise - finalise the delivery/return indicating that it is ready for invoicing/crediting. A confirm window will be displayed - if you OK the finalisation, the status will be change to 'Posted'. You will also be asked if you want to create a supplier invoice/credit note for the delivered/returned items.
Select
This is the screen used to select the order line items for which you want to create a delivery. The picture below shows the screen after a supplier and stock location (for which there are outstanding orders) have been entered and the Find button pressed.

The screen will show the line items for all the current finalised orders for which there have been no deliveries yet.
You can see that there are two types of rows in the table, the first shows just the order date, and the second the line item(s). In the above picture there are two orders, each with one line item.
Check the appropriate boxes. If all the line items in an order are being delivered, check the order date row - this will automatically select all items in that order. If only some line items are being delivered, check those and not the order date row.
If you got a part delivery of an item (ie you ordered 20 and got 15), then tick the line - so that this line item gets included in the delivery record, which then you can edit to correct the delivered quantity from 20 to 15.
Press OK to continue, or Cancel to abort.
Edit Delivery
This screen is used to create and edit deliveries.

The fields in the header are as follows:
Supplier Invoice Id - the identifier for the invoice, assigned by the supplier
Supplier - the supplier
Stock Location - the stock location
Date - the date of the delivery
Amount - the sum of the line item amounts
Tax - the total tax included in the Amount
Printed - this box will be checked when the delivery note has been printed
Notes - any pertinant notes
Status - this initially set to In Progress, but can also be set to Cancelled or Posted
The Items tab shows the items being delivered, and the details for the selected line. These are as follows:
Supplier Invoice Line item Id -the identifier for the invoice line item, assigned by the supplier
Product - the product - this is our name for the product
Reorder Code & Description - the supplier's identification of the item
Package Size & Units - the package details
Quantity - the quantity being delivered - this defaults to the quantity ordered, but you can see in the above that we have said that only 3 of the 6 ordered have been delivered
Nett Price - the tax-excluded price from the supplier
List Price - the supplier's list price
Tax - the title tax for the line item
Total - the total tax-included amount for the line item
If you modify any of the supplier information fields (eg Reorder Code & Description, Package Size & Units, Nett & List prices), then when the delivery is finalised, this information will be updated in the product's supplier information.
If the Auto Price Update flag is set (see here), then the product's Cost and Sell prices will also be updated if you modified the Package Size and/or List price.
Note that if this delivery item is linked to an order item, then you will not be able to modify the Product (even though it is an editable field). That is, if you ordered a X but they delivered a Y, then you cannot change X to Y in the delivery line item - you have to delete the X delivery item and add a new delivery item for Y. [You will also have to edit the order to cancel the X's otherwise they will be oustanding on the order.
If you do add a delivery item, make sure that you press Enter after entering the Product name - this will call in all the supplier information so that you can check it and update if required.
Edit Return
This screen is used to edit a supplier return. It has the same fields as the Edit Delivery screen.
Confirm Finalise
When you press the Finalise button on the Suppliers|Deliveries screen, a confirmation window will appear. Press OK to confirm or Cancel to abort.
If you press OK the delivery note status will be set to Finalised and you will be able to print the delivery or return note.
Confirm Invoice
When you finalise a delivery on the Suppliers|Deliveries screen, you will be asked if you want to invoice the supplier. If you OK that, then this confirmation window will appear. Press OK to confirm or Cancel to abort.
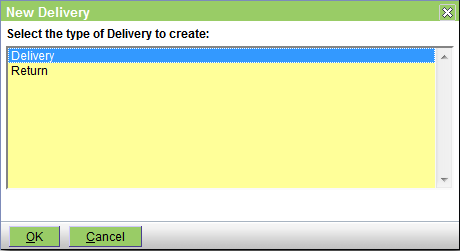
Confirm New
This window allows you to select the type of delivery to be created. Select the required one and press OK, else Cancel to abort. Note that since Delivery is the default type and OK is the default button, you can just press Enter to create the delivery transaction.
Confirm Reverse
When you press the Reverse button on the Suppliers|Deliveries screen, a confirmation window will appear. Press OK to confirm or Cancel to abort.
?? need more ???
?? correct URL ???