Templates
The Administration|Templates screen is a select screen that allows you to select the specific Template to be viewed or maintained.
There are 5 different types:
- Appointment Reminder SMS Template
- Document Template
- Email Template
- Letterhead
- Patient Reminder SMS Template
- System Email Template
Note that the only diffence between Email Templates and System Email Templates is that the System Email Templates are not available as templates on the Email Write screen. Thus System Email Templates are normally used as the email templates specified as the Email Template in Document Template to be used when emailing the document.
Below is the screen as initially displayed but with the Type pull-down list showing.

Each Type has its own view/edit screen.
Once you have pressed the Find button and items are displayed, more buttons are displayed as shown below.

The Delete button will initiate the deletion of the selected item. You will not be able to delete it if it is in use.
The External Edit button is used to edit the document content of those templates which have Open Office odt document contents, and will be disabled otherwise.
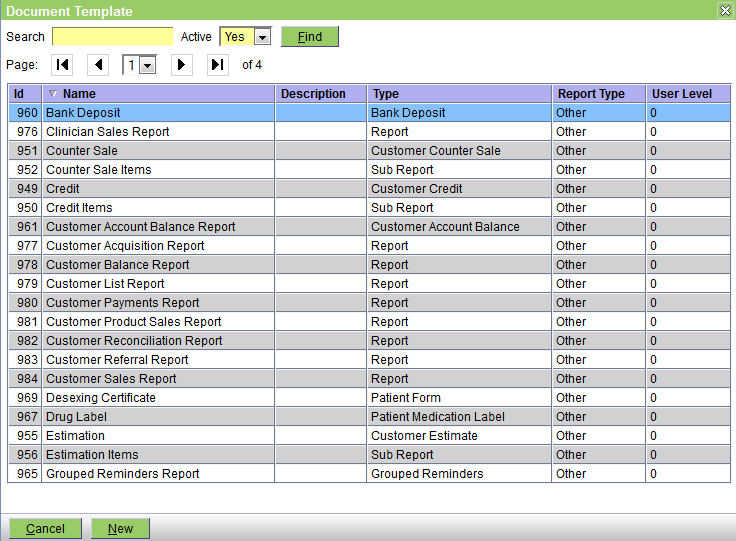
When items are displayed and they are all of the same type, then the columns change to suit the type - contrast the screen below which displays Doucument Templates with that for the All case above.

The meanings of the column headings are documented in each of the Template create/edit screens in this section.
Appointment Reminder SMS Templates
These are used to generate SMS text for appointment reminders - both those sent out by the system by the Appointment Reminder Sender, or when the Reminder button on the Workflow|Scheduling screen is used to send an ad-hoc reminder.
When sending SMS Appointment Reminders for appointments in a given schedule, the template used is determined by looking at the location set for that schedule (via Administration|Organisation|Schedule) and then using the SMS Appointment Reminder template set for that location (via Administration|Organisation|Practice Location).
This is the template selection screen for Appointment Reminder SMS Templates.

Create/Edit/View
This is the create/edit/view screen for SMS appointment reminder templates.
These are used to generate SMS text for appointment reminders based on an expression. The template can be plain text, macros, or an XPath expression.
The screen is in two parts - the top contains the fields, the bottom allows the template to be tested.

The fields are as follows:
| Name | the name of the template |
| Description | a description of the template. This should be used if necessary to clarify the purpose of the template. |
| Active | uncheck this to deactivate the template. |
| Content Type |
the template content type. One of Plain Text, Macro or Expression |
| Content |
The content used to generate the SMS text. This should produce text no longer than 160 characters. XPath expressions may use the following variables directly:
These variables are also available to XPath expressions used by macros, if the Content Type is Macro. The expression itself can be up to 5000 characters long so can be quite complex |
The bottom part of the screen contains:
| Customer | allows a customer to be selected, to test the template |
| Patient | allows a customer to be selected, to test the template |
| Message | the generated message. The count shows the number of characters remaining. |
| Status | this displays any error message, if the template fails to generate the SMS text |
Example XPath expression
concat("Reminder: ",
        expr:if(expr:var("patient.name") != "", concat(expr:var("patient.name"), " has"), "you have"),
        " an appointment at " , $location.name," on ", date:formatDate($appointment.startTime, "short"),
        " @ ", date:formatTime($appointment.startTime, "short"), $nl,
        'Call us on ', party:getTelephone($location), ' for any queries')
The XPath expression above will generate an SMS message like:
Reminder: Muffett has an appointment at Main Clinic on 28/11/15 @ 9:00 AM
Call us on 041312345 for any queries
If the appointment has no patient, it will generate an SMS like:
Reminder: you have an appointment at Main Clinic on 28/11/15 @ 9:00 AM
Call us on 041312345 for any queries
Example XPath expression for Surgery
It is quite possible to generate difference messages depending on the type of appointment. This example generates a different message if the appointment type is 'Admit - Surgery'
expr:if($appointment.appointmentType.entity.name = 'Admit - Surgery',

concat("Reminder: East Island Vets Surgery Appointment", $nl,
        expr:var("patient.name")," ",
        date:formatDate($appointment.startTime, "short"),
        " @ ", date:formatTime($appointment.startTime, "short"), $nl,
        "Remember: water is OK but no food after 9pm ",date:formatDate(date:add($appointment.startTime,"-1d"), "short"),$nl,
        'If queries phone ', party:getTelephone($location)),

concat("Reminder: East Island Vets Appointment", $nl,
        expr:if(expr:var("patient.name") != "",expr:var("patient.name"), "is on")," ",
        date:formatDate($appointment.startTime, "short"),
        " @ ", date:formatTime($appointment.startTime, "short"), $nl,
        'If queries phone ', party:getTelephone($location))

)
For a surgery appointment with a patient 'Mr Moo' this will generate an SMS message like:
Reminder: East Island Vets Surgery Appointment
Mr Moo 15/12/15 @ 10:00 AM
Remember: water is OK but no food after 9pm 14/12/15
If queries phone 2915 3999
Date Switching
If you want to replace the date by 'today' or 'tomorrow' when appropriate, you can use the following as a replacement for the date:formatDate() call in the above:
        expr:if((date:formatDate($appointment.startTime) = date:formatDate(date:now())),"today",
        expr:if((date:formatDate($appointment.startTime) = date:formatDate(date:add(date:now(),"1d"))),"tomorrow",
        date:format($appointment.startTime, "dd MMM")))
Email Templates
Email Templates and System Email Templates are used to fill the subject and content of emails.
These can be used when:
- writing emails
- sending documents such as invoices or referral letters, via email. Here, the email template is linked to the relevant Document Template and it is normal to set these as System Email Templates so that they are not available to users on the email write screen
That is, System Email Templates are provided to differentiate between templates used for emailing standard documents (e.g. invoices), and the templates available in the Write Email Templates window.
Both Email Templates and System Email Templates may be used for the former, but only Email Templates may be used for the latter.
Templates can contain:
- plain text
- macros
- expressions
- documents
The following is a simple template for use when emailing a handout pdf that is not held in the OpenVPMS database - ie you use this template and then manually attached the Kidney function pdf to the email.

The following is a cover note used when emailing an invoice: (this template would be set as the 'Email Template' on the Invoice document template)

The following is used to generate a sexy looking footer block on emails:

See here for an explanation of the fields.
Documents
When the Content Type is Document the following document types are supported:
- JasperReport (.jrxml), OpenOffice (.odt), Microsoft Word (.doc)
- The object returned by the Content Source expression will be supplied to the document to support merging.
- When selected by the email Template option, any parameters will be prompted for.
If the Content Source expression doesn't return a valid object, the document will be converted to HTML without merging.
- Rich Text Format (.rtf)
No merging is supported. - HTML (.html)
No merging is supported.
Images
Images are supported, with the following caveats:
- Images must be URLs, rather than embedded in documents.
Popular email clients (e.g. GMail and Outlook) don't support embedded images. - OpenOffice should be used to merge OpenOffice/Word documents.
LibreOffice has a bug where all images are embedded in the HTML, and are therefore not displayable in all email clients. - Images may not be displayed automatically by email clients.
According to this link referring to a study done in 2009, "only 48% of email recipients see images automatically".
See also How To: Email Template Tips - Open Office and How To: Email Template Tips - Jaspersoft Studio
Examples
The following shows the email generated by the invoice cover note template:

The following shows the footer generated by the third template:

Create/Edit/View
This is the create/edit/view screen for Email and System Email Templates. These are used to fill the subject and content of emails. Both have the same fields and the only difference between the two is that System Email Templates are not available as templates on the Email Write screen. Both are available as email templates on Document Templates. See here for more background.
The fields are as follows:
| Name | The template name |
| Description | The template description |
| Subject Type |
Determines how the Subject is processed. One of:
|
| Subject | The subject to evaluate |
| Subject Source |
An optional expression to select the object to evaluate against. This is only applicable when the Subject Type is Macro or Expression. E.g. a value of: $customer would evaluate Subject against the current customer. |
| Content Type |
Determines how the Content is processed. One of:
|
| Content | The content to evaluate |
| Content Source |
An optional expression to select the object to evaluate the Content against. This is only applicable when the Subject Type is Macro, Expression or Document. E.g. a value of: $patient would evaluate Content against the current patient. |
| Active | determines if the template is active or inactive. If it is inactive it is not available for selection. |
Source Expressions
The Source Expressions can be any expression or variable that sets the object to evaluate the content against. This can be:
- a macro variable , ie $customer, $patient, etc
- a period (.) meaning the current document. This is most useful when creating cover-notes for use when emailing documents via the Print|Email operation.
- left blank. For pre-filled emails, the invoice or document etc will be passed. In this case, it is equivalent to using a period.
- an xpath expression returning an archetype object e.g. openvpms:get(., 'patient.entity')
Documents
When the Content Type is Document the following document types are supported:
- JasperReport (.jrxml), OpenOffice (.odt), Microsoft Word (.doc)
- The object returned by the Content Source expression will be supplied to the document to support merging.
- When selected by the email Template option, any parameters will be prompted for.
If the Content Source expression doesn't return a valid object, the document will be converted to HTML without merging.
- Rich Text Format (.rtf)
No merging is supported. - HTML (.html)
No merging is supported.
Letterhead & Document Control
The Letterhead & Document Control facility provides a mechanism to customise various documents (such as invoices, credit notes, etc) for your practice without having to edit the jrxml files.
The versions of these documents provided in the standard release package use a common letterhead subreport (Letterhead.jrxml) to generate the letterhead portion of each document. The following documents use this letterhead facility:
- all customer documents (ie counter sale, credit, credit and debit adjustments, estimate, invoice, receipt and refund)
- all supplier documents (ie credit, delivery, invoice, order, refurnd,remittance and return)
- patient medical records and problems
- debtors statements
- patient reminders (grouped and non-grouped)
- customer orders (pharmacy orders and returns)
The Administration|Templates screen enables you create a new Letterhead and to select one to delete, edit or view.
You can specify the letterhead to be used for each practice location, and you can specify that multiple locations use the same letterhead.
The Letterhead record is used to define not only the items that go on the letterhead itself, but also items used to customise the various documents. For example on the debtors statement you can specify the various payment options that your practice supports.
Note that you do NOT have to create any letterhead records. However, if you do not, you will not be able to have a logo on your letterhead (unless you customise the supplied Letterhead.jrxml or use customised invoices, etc). You also will not be able to customise the text on statements and other documents.
The letterhead facility is designed to provide good looking documents using plain paper. However, if you do wish to use your own pre-printed letterhead stationary, this is allowed for and, if your printer supports it, you can also use pre-printed stationary for the first page and plain paper for subsequent pages.
The design does assume that your letterhead stationary has the letterhead at the top of the page and that the rest of the page can be printed on - ie you have nothing pre-printed at the bottom of the page. If this is not the case then you will have to use customised versions of the various content files and you will need to use Jaspersoft Studio to clone your versions from the standard Invoice.jrxml etc content files. However, you should be able to get away with just increasing the bottom margin to avoid the pre-printed area at the bottom of the page.
The layout of the document is designed to place the customer (or supplier) address so that it is correctly positioned for use with window envelopes as follows:
- A4 - use standard DL window envelopes. Make the first fold 10.5 cm from the top of the paper.
- A5 - not supported
- Letter - use #10 window envelopes. Note that the window position in #10 envelopes is not standardised, but the positioning should suit those available from the large office supply companies. Make the first fold 4 inches from the top of the paper.
If the address block is not correctly positioned for the window envelopes that you use, then you can adjust the Letterhead AddressBlock template (which uses content 'Letterhead AddressBlock.jrxml'). See below.
If you want to use a customised letterhead then you should clone it from the standard Letterhead.jrxml using Jaspersoft Studio. You should only need to do this when:
- you simply do not like the existing design
- you have multiple practice locations that each have pre-printed letterhead stationary but with different designs
- your letterhead design is such that the pre-printed information occupies more space than the OpenVPMS templates allow for - which is as follows: A4-52.2mm, A5-37.0mm, Letter-1.93ins.
Note that if you are using an A5 template, then the A5 version of your customised letterhead (called say MyPracticeLH) is expected to be in MyPracticeLH-A5.jrxml.
You will also have to provide a customised address block (because a customised letterhead almost always required a customise address block to correctly position the address in the envelope window). This can be cloned from the standard 'Letterhead AddressBlock.jrxml' and if your letterhead is MyPracticeLH, then the address block is expected to be in 'MyPracticeLH AddressBlock.jrxml'.
Resource Bundles
The many of the templates make use of a facility called 'resource bundles'. These are a set of files named report.properties_xxx located in <TOMCAT-HOME>/webapps/openvpms/WEB-INF/classes/localisation. The following ones are supplied with the system:
| File | Locale | Remarks |
|---|---|---|
| reports_en_AU.properties | Australia | taxName=GST, invoiceTitle=Tax Invoice |
| reports_en_GB.properties | Great Britain | taxName=VAT, invoiceTitle=Invoice |
| reports_en_US.properties | United States | taxName= State Tax, invoiceTitle=Invoice |
| reports_zh_HK.properties | Hong Kong | as for GB but taxName=NONE as no sales tax |
| reports.properties | used if no file for the current locale found; needs to be edited to suit your locale |
As well as setting the name of the local tax, the report.properties files set the names of a number of other documents. For example if you want your printed Patient Medical History titled that rather than 'Patient Medical Records' then you need to edit the line:
text.medicalRecordsTitle=Patient Medical Records
If you do edit the file, the changes will not take effect until your restart Tomcat.
Editing the Address Block position
First use Administration|Templates|View to view the Letterhead AddressBlock document template. Then download the content by clicking on the Content button.
Now use Jaspersoft Studio to edit the downloaded Letterhead AddressBlock.jrxml file. Using Studio, simply move the frame containing the address elements as required.

If you feel intimidated by Studio, you can use a good text editor (like NotePad++) to simply edit the file. Find line 43 (which contains the co-ordinates of the frame) and modify these as required. The units are in pixels and 10 pixels = 0.1389 inches or 3.5278 mm.

In both cases save the modified jrxml file and use Administration|Templates|Edit to edit the Letterhead AddressBlock document template and use the Upload button to upload the modified file.
Create/Edit/View
This screen is used to create/edit/view the Letterhead & Document Control records.

The fields are as follows:
Name - the name of the letterhead
Description - an appropriate description
Active - uncheck this box to deactivate the letterhead
Company Tax ID - the tax registration of your organisation. Enter both the registration name (eg ABN, VAT Reg, STS, etc) and the number/code. If your jurisdiction does not require this, leave it blank.
Logo File - enter the name of the file that contains the logo you wish to use. Leave blank if you have none. In the standard Letterhead.jrxml the space allowed for the letterhead is 280 pixels wide, 100 high. If your logo differs from this it will be scaled to fit whilst retaining its shape. NOTE: if you mistype the file name, then no error will be reported but the logo area will be blank on the printed documents.
HTML Logo URL - a URL to the practice logo. This can be used in email templates.
Base URL - a URL prefix used to help construct templates that refer to resources located at a common base path. These could be images, HTML, or plain text for example. The resources must be publicly accessible. When populating the field, it should always containing a trailing slash.
Contacts Source - either enter the Practice Location whose contacts are to be used , or leave blank - in which case the contacts used will be drawn from the user's current location.
Subreport Expression - the content name of the subreport to be used to generate the letterhead (without the .jrxml extension). This can be normally be left as the default value 'Letterhead'. However, if you need to have different letterhead formats for your various locations, then you can clone these from the standard Letterhead.jrxml and specify their content file names here. Note that if you do use say 'MyPracticeLH', then you will also need to provide you own address block subreport with the content name 'MyPracticeLH Address Block.jrxml' and this can be cloned from the standard Letterhead Address Block subreport.
Plain Paper - check this box if you use plain paper. If you use pre-printed letterhead paper, uncheck the box - and the letterhead block will left blank unless the document is being emailed.
Letterhead Page 1 Only - check this box if you use pre-printed letterhead paper but only for the first page (and your printer is set up to print the remaining pages on plain paper). Leave it unchecked otherwise. The setting of this option is ignored unless the Plain Paper option is unchecked.
Use Product Types - check this box to show the product type on each line item in invoices, credit notes, estimates and statements. The line items are grouped by product type and ordered by the product type's Invoice Sort Order. This option is not available on A5 format documents because of lack of space.
Reminders on Invoice - check this box to display on invoices any patient reminders due in the next 12 months. A maximum of 4 lines are shown with reminders for products of the same product type on the same day for multiple patients combined on the one line.
Appointments on Invoice - check this box to display on invoices any appointments in the next 12 months. If there are more than 3 then only the next 3 are shown.
The following fields are use to control messages added to various documents.
Slogan - this text will be placed at the bottom of the last page. It can use be used to display a slogan for your business. Note that space allowed for this is two lines. Text longer than this will be truncated.
Invoice Message - this text is shown at the end of the invoice (both for customer and counter sale invoices)
Invoice Payment Instr. - this text enables payment instructions to be printed on customer invoices (but not counter sales to anonymous customers). If the characters '[REF]' are present in the text they will be replaced by a reference code. This will consist of the first 5 letters of the customer name followed by their customer ID. Hence if Mr Fredricks is customer 34567, the reference code will be FREDR34567.
Receipt Message - this text is shown at the end of the payment receipt
Estimate Message - this text is shown at the end of the estimate
General Message - this text is shown at the end of customer documents other than invoices, estimates and receipts
Order Message - this text is shown at the end of the order
Supplier Message - this text is shown at the end of supplier documents other than orders
The following fields affect the Debtors Statements. They are used to determine what payment instructions are shown, and whether or not Invoice line items are shown:
Credit Card Instructions - if you accept payment by credit card, enter the instructions here, else leave blank
Direct Deposit Instructions - if you accept payment by direct deposit (or other electronic payment method into your bank account), enter the instructions here, else leave blank. If the characters '[REF]' are present in the text they will be replaced by a reference code. This will consist of the first 5 letters of the customer name followed by their customer ID. Hence if Mr Fredricks is customer 34567, the reference code will be FREDR34567.
Payment Option 3 - if you have a 3rd payment option (for example by cheque), enter its instructions here, else leave blank.
Payment Option 4 - if you have a 4th payment option, enter its instructions here, else leave blank.
Line Item Print - determines whether or not the invoice & credit line items are printed. The options are Always, Never, and 'Not Printed'. If the latter, then the line items are shown if the invoice's Print flag is not set. (This flag is set when the finalised invoice is printed - emailing or previewing does not set the flag.)
Reminder Message - this message is added to the end of the Grouped Reminders document.
Patient Reminder SMS Template
This is the create/edit/view screen for SMS patient reminder templates.
These are used to generate SMS text for patient reminders. The template can be plain text, macros, or an XPath expression.
The screen is in two parts - the top contains the fields, the bottom allows the template to be tested.

The fields are as follows:
| Name | the name of the template |
| Description | a description of the template. This should be used if necessary to clarify the purpose of the template. |
| Active | uncheck this to deactivate the template. |
| Content Type |
the template content type. One of Plain Text, Macro or Expression |
| Content |
The content used to generate the SMS text. This should produce text no longer than 160 characters. XPath expressions may use the following variables directly:
These variables are also available to XPath expressions used by macros, if the Content Type is Macro. |
The bottom part of the screen contains:
| Customer | allows a customer to be selected, to test the template |
| Patient | allows a patient to be selected, to test the template |
| Reminder Type | allows a reminder type to be selected, to test the template |
| Message | the generated message. The count shows the number of characters remaining. |
| Status | this displays any error message, if the template fails to generate the SMS text |
Note that for testing purposes, a customer, patient and reminder type must be selected.
Example XPath expressions
For single patient reminders:
concat($patient.name, ' is due for a vaccination at ',$location.name,'.', $nl,
     'Please contact us on ',party:getTelephone($location),' to make an appointment')
The XPath expression above will generate an SMS message like:
Fido is due for a vaccination at Main Clinic.
Please contact us on 041312345 to make an appointment
For reminders grouped by patient:
concat($patient.name,' is due for a ',list:sortNamesOf(.,'reminderType',',',' & '),$nl,
'Please contact us on ', party:getTelephone($location), ' to make an appointment')
To produce text like:
Fido is due for a Grooming, Health check & Vaccination.
Please contact us on 12345678 to make an appointment.
For reminders grouped by customer:
concat(list:sortNames(list:set('patient'),',',' and ',' is',' are'),
    ' due for a visit to ',$location.name,'.',$nl,
    'Call ',party:getTelephone($location),' to make a booking')
To produce text like:
Fido and Muffett are due for a visit to VetsRUs.
Call 041312345 to make a booking.
For a single patient, it will produce text like:
Fido is due for a visit to VetsRUs.
Call 041312345 to make a booking.
You can include reminder types, although its not possible to indicate which reminders apply to which patients.
concat(list:sortNames(list:set('patient'),',',' & ',' is',' are'),
     ' due for a ',list:sortNames(list:set('reminderType'),', ',' & '),$nl,
     'Call ',party:getTelephone($location),' to make a booking')
Document Templates
Every form and report has a document template. The template specifies things like usage, paper format, associated printers, its content, and when it is printed. See also Concepts|Printing for background information, and Create/View/Edit for the template details.
As shown below, the system comes with a number of standard templates. These have to be loaded using the templateload utility (see the readme.txt file in the release package for instructions). Template sets are provided for A4, A5 and Letter. You can use these but you will probably want to modify some of them. You may also want to use a report from the Resource Library set. See below for a quick summary of how to do this.
Template Usage: One can divide the templates into three groups:
Reports - you use the Reporting|Reports screen to select the report to run
Selectable forms - (eg Patient Forms) you will be presented with a list to select from
System forms - (eg Invoices) where the system chooses the template.
For the first two you can obviously set up as many as you need - you just choose the one you want. In the last case (eg Invoices) you need to be careful because if you create three different invoice templates, the system will just use the first it finds. This is not normally a problem - after all you only need one type of invoice form. However, if you do want to use different templates for each Practice Location, then you can do this by defining the templates to be used by the location. See Administration|Organisation|Practice Location.
If you do need to create or modify reports and forms, see Reference|Reports and Forms. Note that if you want to modify an existing report or form, then if you View the template, you can then click on the Content field to download the report/form ready for editing.
Installing a new template
To install a new templatefrom the Resource Library, do as follows:
- download the jrxml (or odt) file by right-clicking on the attachment link and using 'Save Link As' (or 'Save Target As' etc depending on your browser) - remember where you saved it
- click the New button
- on the resulting New Document Template screen set the Type to Report, then click the Upload button. If it's not a report, then you need to set the appropriate Type.
- on the resulting window, click Browse and navigate to where you downloaded the file and select it. Click the Send button.
- back at the Edit Document Template screen, click the OK button
Changing a standard report paper size
The system comes with a set of reports and documents in the <OPENVPMS-HOME>/reports directory. This is structured as follows:
 |
You can see that there are 8 directories with most having multiple sub-directories, one per function, and each of these has a sub-directory for each paper size each containing the templates for that paper size. Note that not all paper sizes are provided. In particular, the Reports are provided only in A4 and Letter and not in A5. So if you initially loaded the A4 set, and want to change your invoices to the A5 equivalents, then you need to load the templates in Customer/Invoice/A5. Do this by editing each template, and then pressing the Upload button to load the appropriate content. For the invoices you will see that the directory contains the files Invoice.jrxml, Invoice Items.jrxml, Invoice Appointments.jrxml, Invoice Notes.jrxml and Invoice Reminders.jrxml. Hence you need to edit the Invoice, Invoice Items, Appointments, Notes and Reminders templates, and in each case upload the relevant file from the Customer/Invoice/A5 directory. Note that these A5 versions use the A5 versions of the Letterhead and Addressbock templates, but these should be present as they are loaded as part of the A4 template set in case you ever want to use some A5 versions.
|
Create/Edit/View
This is the create/edit/view screen for document templates. See also Concepts|Printing and Administration|Templates|Document Templates for background information.

The fields are as follows:
Name - the name of the template. The name can be anything (ie in the example above, we could change the name to 'ABCDE' and the system would still work) but it is sensible to use meaningful names. You can have multiple templates with the same name, but again, it is sensible not to.
Description - a description of the template. This should be used if necessary to clarify the purpose of the template.
Active - uncheck this to deactivate the template.
Type - this is used to define the usage of the template - for example when printing an invoice for a customer, the system looks for templates of type 'Customer Invoice'. The Type also defines what information fields are made available to the Content generator (see below). Most of the Types are self explanatory. Use 'Report' for a report (eg a list of customers or sales, etc), and 'Sub Report' for the report's repeated components (ie the line items). See also this summary.
User Level - this allows you to define who can run which reports. Each user has a level (0-9). A user with level N can only run reports of level N and below.
Report Type - select the report type from the pull-down list. Those available are set using Administration|Lookups|Report Type. The Report Type can be used to select a group of reports on the Reporting|Reports screen.
Preferred Print Mode - this determines when documents are printed or offered for printing. The option is used when the document is generated as a result of invoicing an item which has an attached document. It can be set to:
None - the print mode is not specified
Immediate - print immediately using the printer/interactive option
Check Out - (the default) delay print until at Check Out time
Manual - documents must be manually selected for printing
At Check Out time, the system checks if any documents have been accumulated. If there are any that have not been printed, then a window is displayed showing the accumulated documents each with a print checkbox - those that have already been printed, and those with Mode=Manual will have the box unchecked - those whose mode is 'Check Out' will have their box checked.
Paper Size - used to indicate to the printer what size paper is required. It can be set to None, A4, A5, Custom, and Letter. Normally can be left at 'None' unless the printer(s) that you are using allow the selection of different sized paper.
Content - the 'content' is the name of the file containing the JRXML report or Open Office or Microsoft Word template used to generate the document. See also Introduction|Reporting and JXPath Extension Functions.
If you are editing the template, click the Upload button to upload the required file. If you are viewing the template, then you can click the content file name to download the template content.
Note that for templates that are Type=Subreport, the Report that uses the subreport finds the subreport via its Content name, not its Template name. Hence if you edit a subreport template and upload content with a different file name, you will have to modify the report to use this new subreport content name.
Orientation - set to Portrait or Landscape as required
Copies - set to the required number of copies
Paper Height, Width and Units - these can normally be left at their defaults unless you have specified 'Paper Size' as Custom.
Note that for OpenOffice and Microsoft Word templates, the Paper Size, Orientation, Paper Height, Paper Width, and Paper Units settings of the Document Template are ignored. These settings must be specified within the OpenOffice or Word template. That is, they are only used for templates that use Jasper Reports (jrxml) content.
Email Template - this is used when sending a document via email. It is:
- required when the system is generating emails to send out reminders and statements;
- optional for all other Document Templates. If present, it will be used to pre-fill emails with content when you use Print|Email to email the document.
Note also that the reminder and statement emails will have a From address that will be set as follows (where RB is the contact purpose and is Reminder for reminders and Billing for statements):
- the RB email contact associated with the customer's Practice Location; or
- the Practice's RB email contact, if the customer doesn't have a Practice Location, or the Practice Location doesn't have an RB email contact; or
- the Practice's preferred email contact, if there is no RB email contact
SMS Template - this is used for customers that have elected to receive SMS messages for patient reminders.
File Name Format - used to specify the file name format of generated documents. If unspecified, the document name is derived from the template file it was generated from. So a PDF generated from the template 'Invoice A5.jrxml' would be assigned the name 'Invoice A5.pdf'. Available formats are determined by Administration|Lookups|File Name Format
Printers tab
The Printers Tab is used to display and maintain the printers that can be used with this template. You don't have to use this facility, but if you don't then your users will have to choose the required printer each time they print something.
Before using this you need to set up the printers available to the Practice Locations(s) - see Administration|Organisation|Practice Location.
The fields are as follows:
Practice Location - the Practice Location. Note that you can also insert the Practice here. This useful for the case where you want to set a global default printer, and override it for one (or more) locations. For example if the standard label printer is LABEL-R, but for the upstairs office you wish to use LABEL-U, then it may be more convenient to set LABEL-R for the practice, and LABEL-U for the Main-Upstairs location, than to set the label printer for each practice location. Of course, if you only have two practice locations, then it makes no difference which way you do it, but if you have a more complex setup then it may be better to use the 'set for practice, and override for one location' approach.
Printer Name - choose one from the pull-down list
Paper Tray - if applicable, select the required tray - you will want to use this if you are running plain paper in one tray and letterhead in the other
Interactive - check this box if you want the print dialog box to be displayed (so you can use preview or email rather than print, or change the printer if necessary or load the required paper or ...) before the printing occurs. If the box is not checked, then printing proceeds immediately.
Summary
The following table summarises the standard Document Templates and their Types and usage.
| Document Template Name | Template Type | Used by/for |
|---|---|---|
| Bank Deposit | Bank Deposit | Reporting|Deposits|Print |
| Customer Account Balance Report | Customer Account Balance | Reporting|Debtors|Report |
| Counter Sale | Customer Counter Sale | Customers|Charges|Counter Sale|Print |
| Credit | Customer Credit | Customers|Charges|Credit |
| Estimation | Customer Estimate | Customers|Estimates|Preview|Print |
| Invoice | Customer Invoice | Customers|Charges|Invoice|Print |
| Receipt | Customer Payment | Customers|Payments|Payment|Print |
| Statement | Customer Statement | Reporting|Debtors|Print & Send All |
| Grouped Reminders Report | Grouped Reminders | Reporting|Reminders|Send All |
| Message | Message | Workflow|Messaging|Print |
| Desexing Certificate | Patient Form | check-in processing |
| Vaccination Certificate | Patient Form | check-in processing |
| Patient Image | Patient Image | Patients|Medical Records|Documents|Print where the item is an Image |
| Referral Letter | Patient Letter | report macro |
| Reminder Cartrophen First | Patient Letter | Reporting|Reminders|Print & Send All |
| Reminder Desexing First | Patient Letter | Reporting|Reminders|Print & Send All |
| Reminder Vaccination First | Patient Letter | Reporting|Reminders|Print & Send All |
| Reminder Vaccination Puppy and Kitten First | Patient Letter | Reporting|Reminders|Print & Send All |
| Reminder Vaccination Second | Patient Letter | Reporting|Reminders|Print & Send All |
| Drug Label | Patient Medication Label |
Customers|Charges|Invoice & Patients|Medical Records|New|Medication where item has a dispensing label |
| Patient Clinical Event | Patient Visit | Patients|Medical Records|Print |
| Patient Reminders Report | Reminder Report | Reporting|Reminders|Report |
| Clinician Sales Report | Report | Reporting|Reports |
| Customer Acquisition Report | Report | Reporting|Reports |
| Customer Balance Report | Report | Reporting|Reports |
| Customer List Report | Report | Reporting|Reports |
| Customer Payments Report | Report | Reporting|Reports |
| Customer Product Sales Report | Report | Reporting|Reports |
| Customer Reconciliation Report | Report | Reporting|Reports |
| Customer Referral Report | Report | Reporting|Reports |
| Customer Sales Report | Report | Reporting|Reports |
| Patient Acquisition Report | Report | Reporting|Reports |
| Patient Deceased Report | Report | Reporting|Reports |
| Patient List Report | Report | Reporting|Reports |
| Patient Sterilisation Report | Report | Reporting|Reports |
| Practice Clinician Sales Report | Report | Reporting|Reports |
| Product List Report | Report | Reporting|Reports |
| Product Price List Report | Report | Reporting|Reports |
| Stock Reorder Report | Report | Reporting|Reports |
| Stock Take List Report | Report | Reporting|Reports |
| Stock Valuation Report | Report | Reporting|Reports |
| StockTake Sheet Report | Report | Reporting|Reports |
| Counter Sale Items | Sub Report | line items component of Report |
| Credit Items | Sub Report | line items component of Report |
| Estimation Items | Sub Report | line items component of Report |
| Invoice Items | Sub Report | line items component of Report |
| Invoice Reminders | Sub Report | line items component of Report |
| Order Items | Sub Report | line items component of Report |
| Receipt Items | Sub Report | line items component of Report |
| Statement Items | Sub Report | line items component of Report |
| Order | Supplier Order | Suppliers|Orders|Preview & Generate |
| Till Balance | Till Balance | Reporting|Till Balances|Print |
| Work In Progress Report | Work in Progress Charges | Reporting|Work In Progress|Report |
Delete Template
When you press the Delete button on the Administration|Templates screen, a confirmation window will appear.
If the selected Template is not in use and can be deleted, the window will simply ask you to confirm the delete. Press OK to confirm or Cancel to abort.
If it cannot be deleted because it is in use, the text will be "xxxx has relationships and cannot be deleted. Do you want to deactivate it instead?"(where xxx is the name of the item you are trying to delete). Pressing OK will unset its Active flag, Cancel will abort.
Select
This is the screen used to select a Document Template, SMS Appointmnent Reminder Template or Letterhead. It works like a standard select screen.
It will be presented whenever you need to choose a template, for example when assigning document, templates to a Practice or Practice Location, or (more commonly) when selecting a document at check-in time. In the latter case only the relevant templates will be displayed.
The following is the screen for selecting a Document Template.