Setting Up Email To SMS using Generic SMS Gateway: One User's Experience
openVPMS: Setting Up openVPMS to send SMS Using Your ISP's EmailToSMS facility.
CONTENTS
1. Introduction
The ability to send SMSs from within openVPMS is one of the stand-out enhancements to openVPMS v1.5. Whilst two commercial SMS gateways are provided with openVPMS (smsglobal and ClickaTell), you may well be able to use your own clinic ISP to utilise this feature without signing up to these gateways.I'm going to show you the steps I've taken using the SMS-sending feature that's part of my clinic's ISP. As with all things openVPMS, it's actually quite simple to set up, especially when someone has shown you the way.
My ISP for both clinic and home is Exetel, but your ISP probably offers the same facility. Quoting their website "Exetel provides the ability for any user to send SMS messages using their DSL (Exetel DSL as well as non-Exetel DSL) service instead of a mobile telephone. To send an SMS message all you need to do is to go to your Exetel Members Facilities and select the "SMS" button found on the left sidebar menu. If you do not have an Exetel DSL service you can apply for a prepaid or post-paid SMS only account."
We've used their SMS via ADSL for some years and I was eager to see if I could integrate openVPMS and Exetel's EmailToSMS service. I'm pleased to report that it works like a charm (subject to a "gotcha" I'll explain later in this tutorial).
Whilst most of you probably don't use Exetel, I hope this tutorial will give you some insight that may be of use with your own ISP.
There's thus obviously two components: the openVPMS section and the ISP (in this case, Exetel) section.
2. Configuring the ISP
Log into your ISP account - usually this is the members' section.
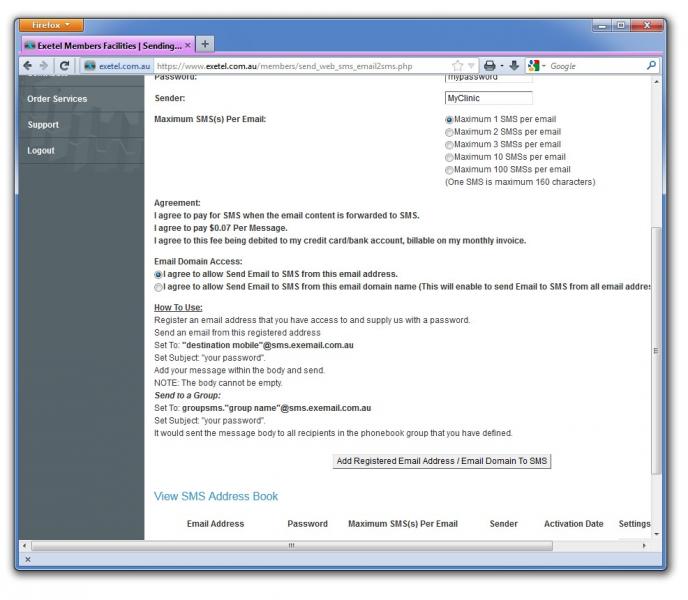
EmailToSMS works by sending an email to 04nnnnnnnn[at]sms.exemail.com[dot]au from your registered address with your password as the subject.The Sender that the recipient sees can be a mobile number (to which they can reply) or a text string of up to 15 characters (alpha characters, no space); thus you can have your SMSs go out with "Myclinic" as the sender: recipients then don't wonder what this unrecognisable number that's texting them belongs to and you don't have to include the now ubiquitous "no reply to this number" advice at the bottom of every SMS. Of course, if you do use text as the sender, the recipient can't reply to that at all.
Insert the following:
- Email address: this can be your clinic address, or a separate email address you've invented/created for this function: it'll never be seen or used by anyone: it has no purpose other than it is part of the authentication process.
- Password: pick a password of your choice: whilst this will be placed in the "Subject" of the email, it will not appear anywhere as it is also part of the authentication process;
- Sender: this is the sender that the recipient of the email will see: your choice - a 10-digit mobile number (04nnnnnnnn) or an alphanumeric string of up to 15 characters: no spaces permitted;
- Maximum SMS(s) per email: I selected one SMS per email (I don't see how more than one SMS per email would work in our situation).
Click on the radio button to agree.
Check that you've set everything up correctly and click on Add Registered Email Address/Email Domain To SMS button.
You're done!
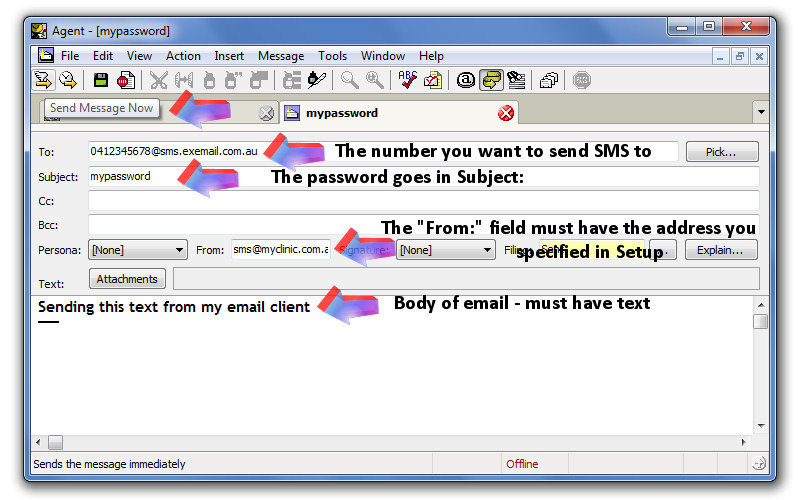
If you're like me, you can't wait to try it out: open your email client and try it out (use your own mobile number - (duh!)).......
Click Send. Your test SMS will appear on your phone.
("Capture it" screenshot from my Blackberry Bold 9000)
As you can see, it's much easier to identify the sender if it's text, not numeric.
Ok, that's done - time to move on to configuring openVPMS.3. Configuring openVPMS
First we need to ensure that your mail server details are correctly set up in openVPMS: it's different in v1.5 than it was in v1.4.
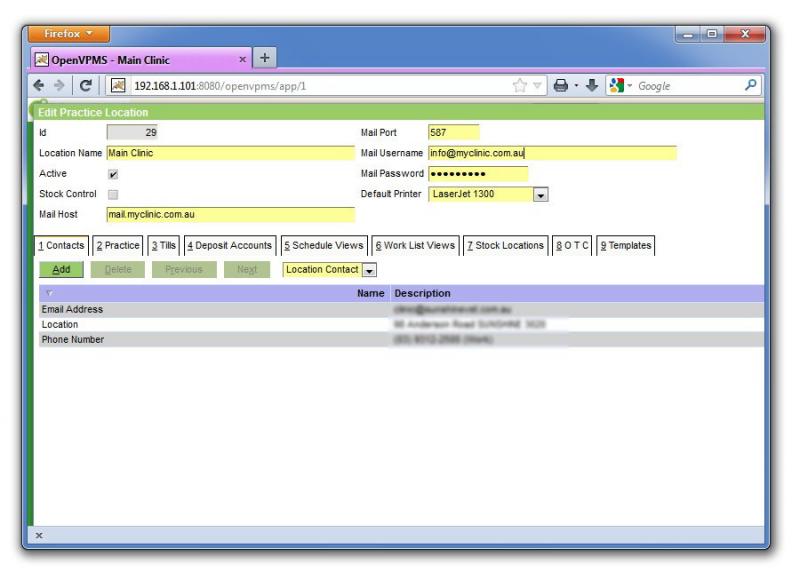
- Click on Administration | Organisation | Practice Location.
- You need to fill in the data for your outgoing mail host. Probably the best place to get this is to open your email client and look under Tools | Account and Server Settings. You'll need "Outbound Mail Server" for openVPMS's Mail Host, email username and password in the appropriate places as well as the outgoing (SMTP) port.
Click Ok to save the configuration.
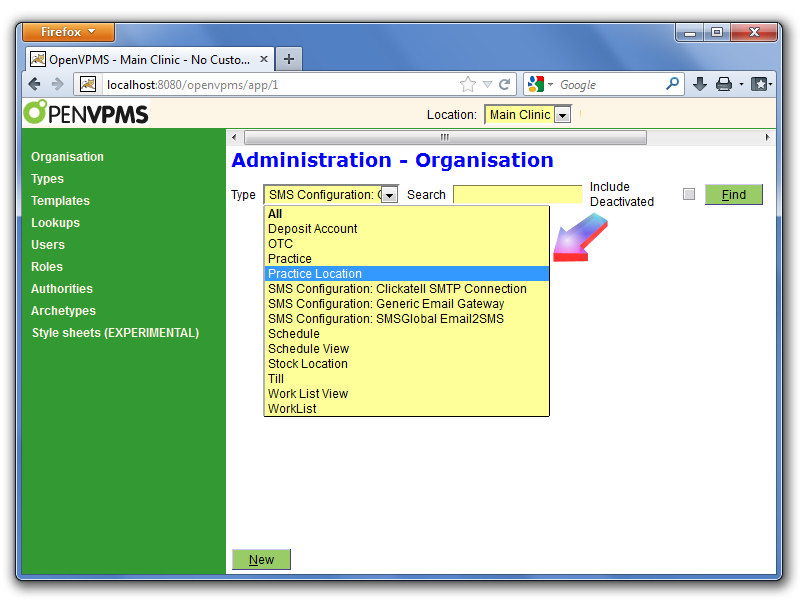
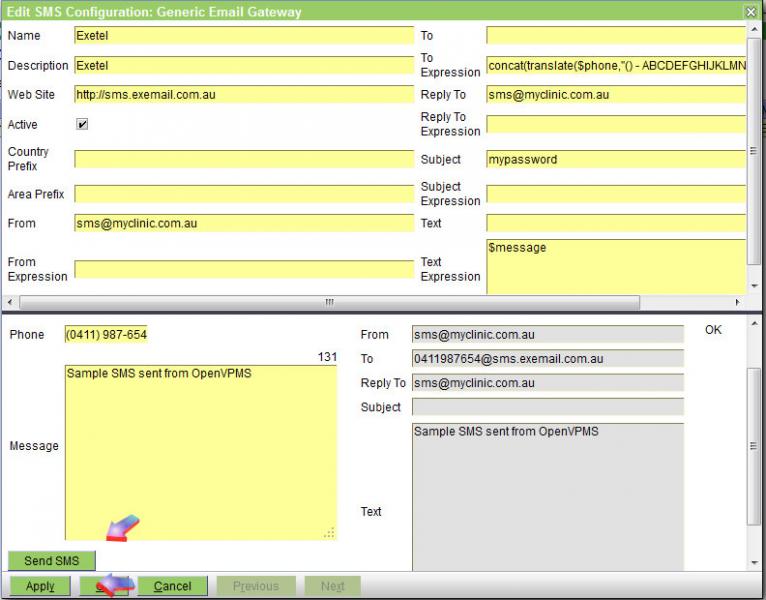
- Click Administration | Organisation and select SMS Configuration: Generic Email Gateway.
- Click New.
- Fill in the details as shown below: the To Expression concat($phone,'@sms.exemail.com.au') will return the phone number in the format required. Click Apply when you're done.
In the lower window, put your own mobile number (you might need to click Apply again). If there's no error message under Status, the test message is ready to be sent (the subject in the lower window will be blank).
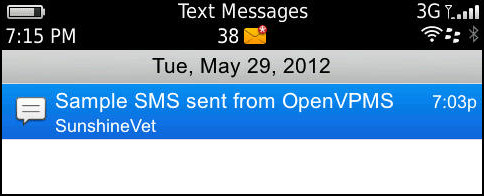
- If you've done everything right, click Send SMS. Within a few seconds, your test SMS should appear on your phone, complete with your clinic name as Sender.
("Capture it" screenshot from my Blackberry Bold 9000)
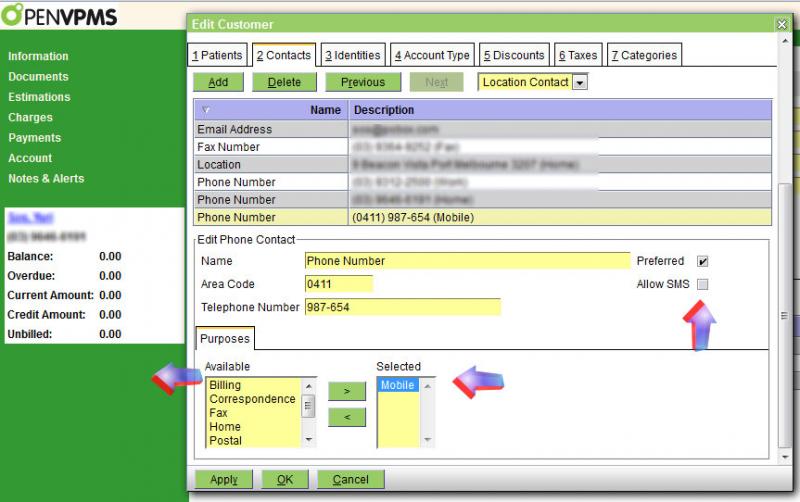
- You now need to set up each client's phone details and ensure that the number is set as mobile and the Allow SMS option is checked: see images below:
Once you click Ok (NOT Apply), a Send SMS button will appear under the panel at left:
You can enable more than one mobile number per client to receive an SMS: when you click on the Send SMS button, you will be presented with a drop-down list of numbers from which you can select.
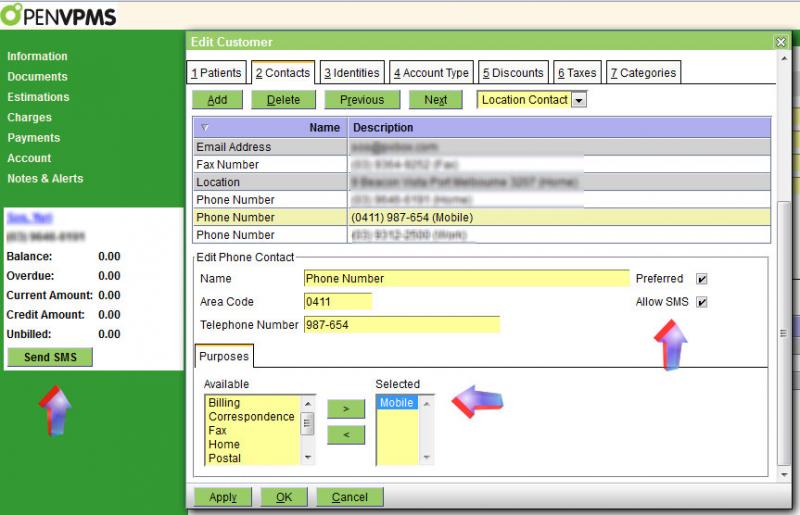
You should now be ready to send SMSs directly from your openVPMS; while version 1.5.1 collects phone numbers only from the actual number field, version 1.6 will extract the mobile phone number from both area code and number fields, strip off spaces, hyphens and extra text so that a phone number such as (0411) 987-654 (ask for Jane)..............
.......... will appear in your SMS window as 0411987654: see image below:
Hope this is of some help to you.
Uploaded 10 June 2012, amended for v1.6 18 June 2012 (Yuri Sos)


- Printer-friendly version
- Login or register to post comments


