Configuring Your New Installation
Setting Up openVPMS: Configuration: Your First Steps.
CONTENTS
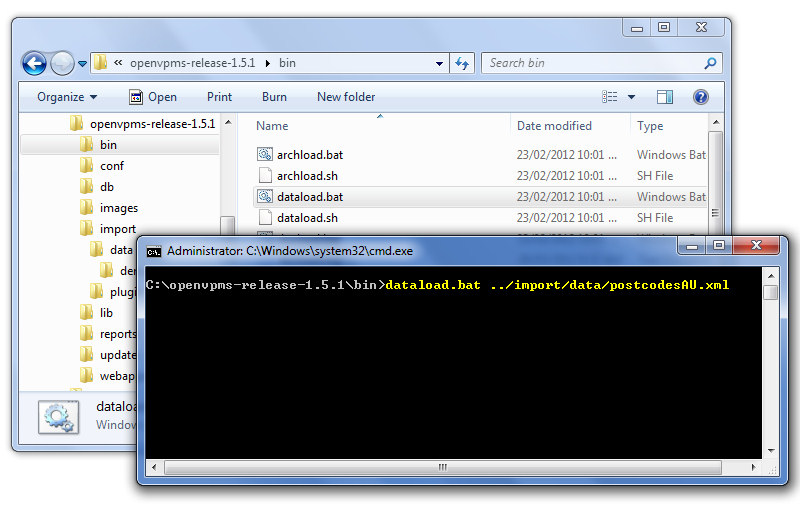
1. Adding Towns and States (all of Australia)
dataload.bat ../import/data/postcodesAU.xml
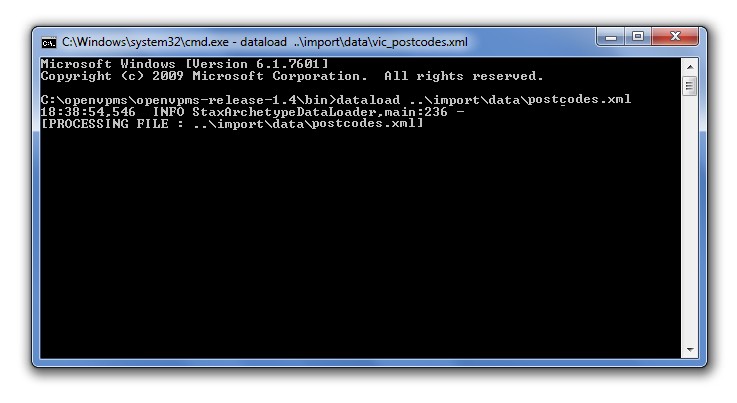
You will see a series of processing messages.......
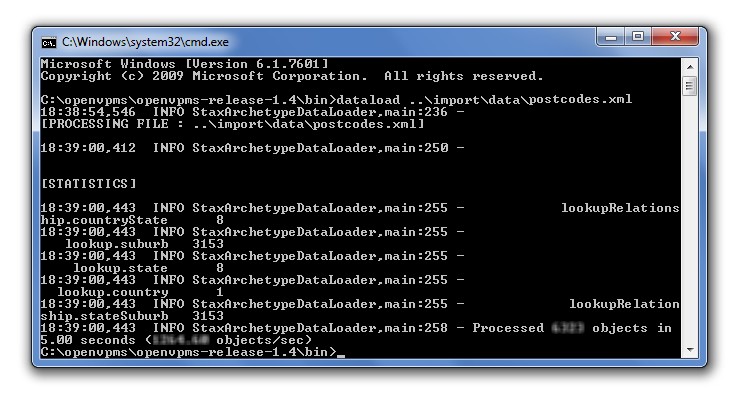
.... and be returned to the Command Prompt when the dataload has completed.
Make sure you haven't added any states or suburbs first as this may cause duplicate errors and the load would fail.
Close the Command Prompt window when you're done.
2. Adding Your Clinic Details
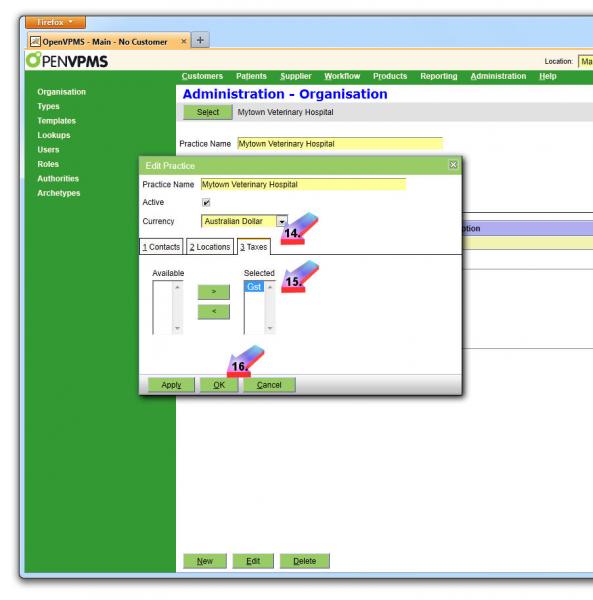
Click Edit, delete "openvpms practice" and type in your clinic's name (6), click Contacts (7) | Add (8) and enter your clinic's address (9). Press Apply (10).
Click on Phone Number (11), enter your clinic area code and number (12), and click Apply (13).
Click on Taxes (14), select Gst in left column and click on arrow to move into "Selected" column (15). Click Ok (16) to save changes and complete this section.
Click Administration | Organisation | Main.
In the same manner as decribed above, set up location and phone number.
Click on Practice | Add | Click on Binoculars | double-click on your hospital name.
Select your default printer from a drop-down box (this should be a printer installed to the server on which openVPMS resides either as a local or network printer).
If you're going to send email from openVPMS, you'll need to place the address of your ISP's smtp mail server here (as shown above). Look in the configuration of your email client (Outlook, Thunderbird, etc) for "outgoing mail server" for the server address. You'll need to add these to this screen: place your ISP's smtp server at Mail Host and your email address and passwords in the appropriate fields, as below:
Click Ok to save changes and complete this section.
3. Setting Up Scheduling
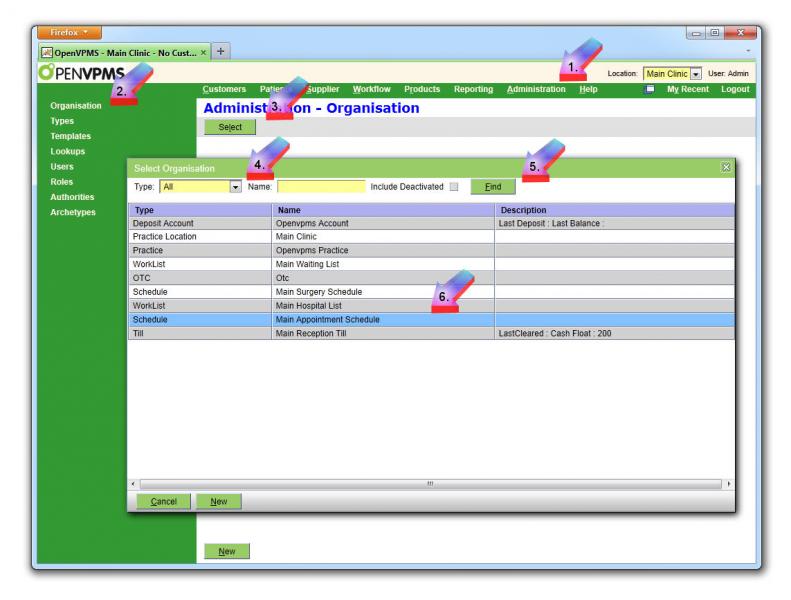
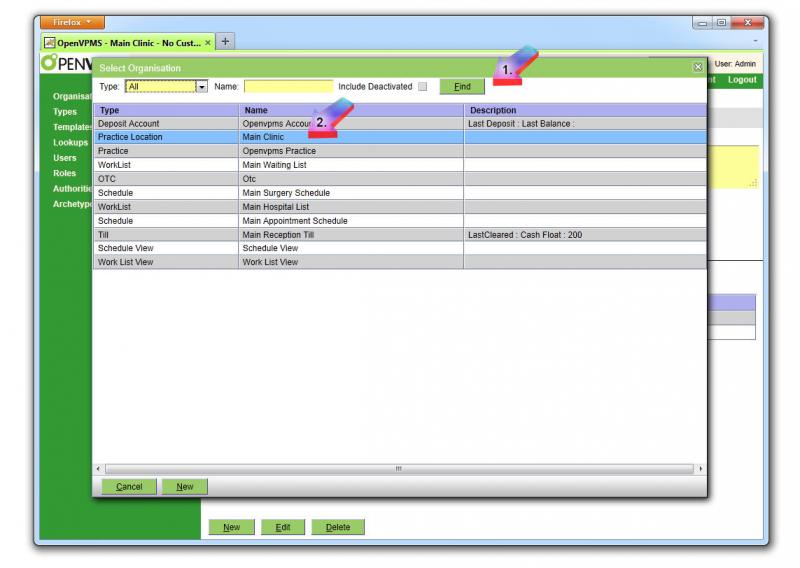
Click on Administration (1) | Organisation (2) | Select (3) | All (4) | Find (5).
Double-click on Main Appointment Schedule (6).
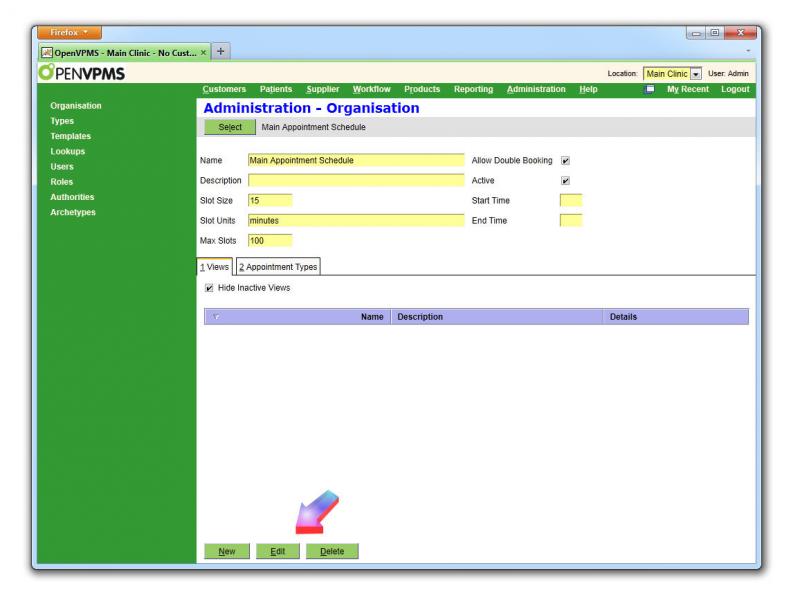
Click on Edit.
Fill in start and end times in 24 hour format (eg 0900), select slot size, and click OK.
Once again, click on Administration | Organisation | Select | All | Find .
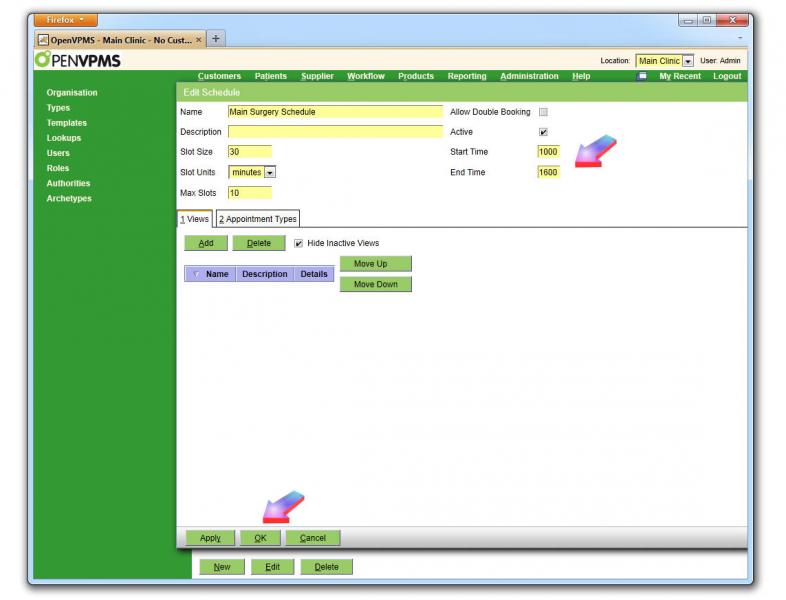
Double-click on Main Surgery Schedule.
Fill in start and end times in 24 hour format (eg 0900), select slot size, and click OK.
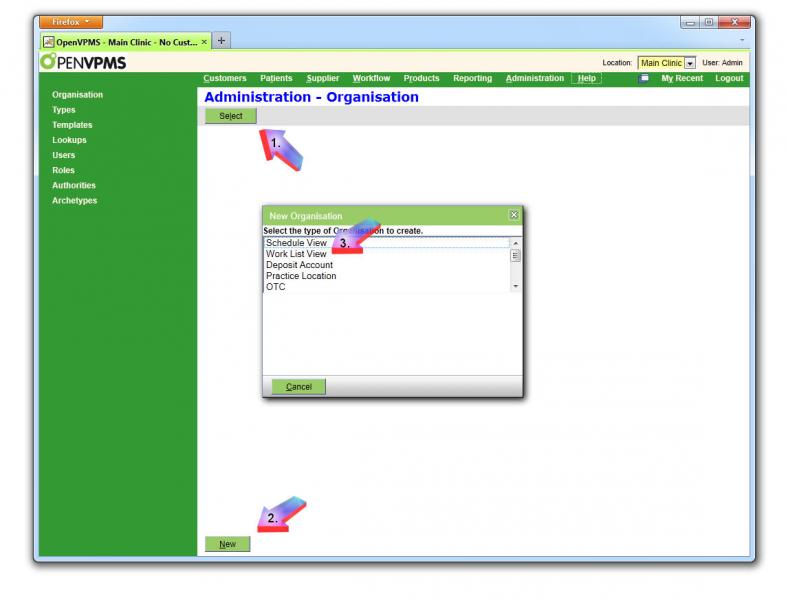
Create a new Schedule View called Schedule View.
Click on Administration | Organisation | Select | Schedule View | Find .
You'll see No results to display.
Click on New.
A new window pops up.
Type in Schedule View (1).
Click Add (2) | Binoculars {Search}.
Double-click on Main Appointment Schedule (4).
Window will close. Press OK (5).
Click Edit (1) | Add (2) | Binoculars {Search} (3).
Double-click on Main Surgery Schedule (4).
Window will close. Press OK (5).
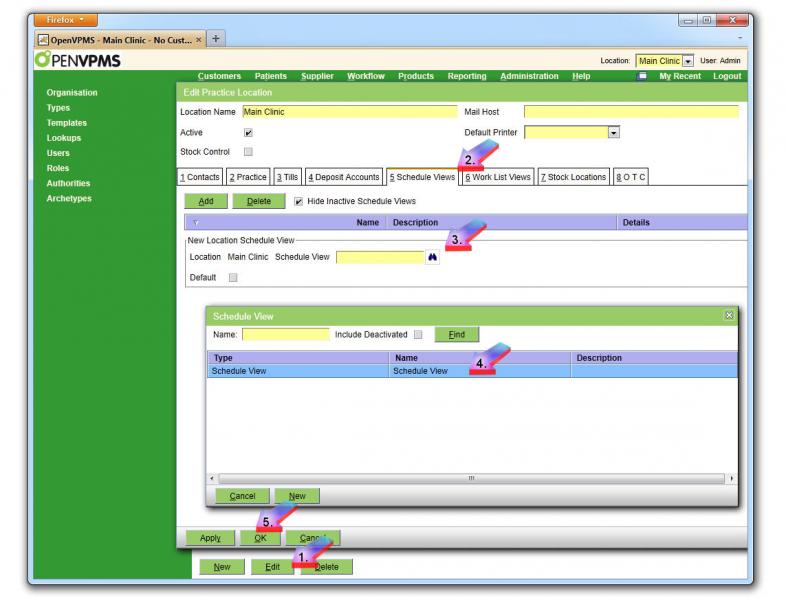
Click on Administration | Organisation | Select | All | Find .
Double-click on Practice Location (Main Clinic).
Click Edit. A new window pops up.
Click Edit (1) | Add (2) | Binoculars {Search} (3).
Double-click on Schedule View (4).
Window will close. Press OK (5).
Log out, then log in again.
Click on Workflow | Scheduling and you should be able to add, modify and remove appointments.
4. Setting Up Work List
Your resultant screen should look like this:
Click on Administration | Organisation | Select | All | Find .
Double-click on Practice Location (Main Clinic).
Click Edit. A new window pops up.
Click Work List Views (2) | Add (3) | Binoculars {Search} (4).
Double-click on Work List View (5).
Window will close. Press OK (6).
Log out, then log in again.
Click on Workflow | Work Lists and you should be able to add, modify and remove clients on and off lists.

Compiled 10 August 2011 by Yuri Sos from many forum posts


- Printer-friendly version
- Login or register to post comments


