CONTENTS
Introduction
This tutorial describes step-by-step preparation of an alternate demo version of openVPMS for training purposes, allowing you to run the system without compromising your main installation.
You should be logged into the PC where openVPMS resides using an account with Administrator privileges.
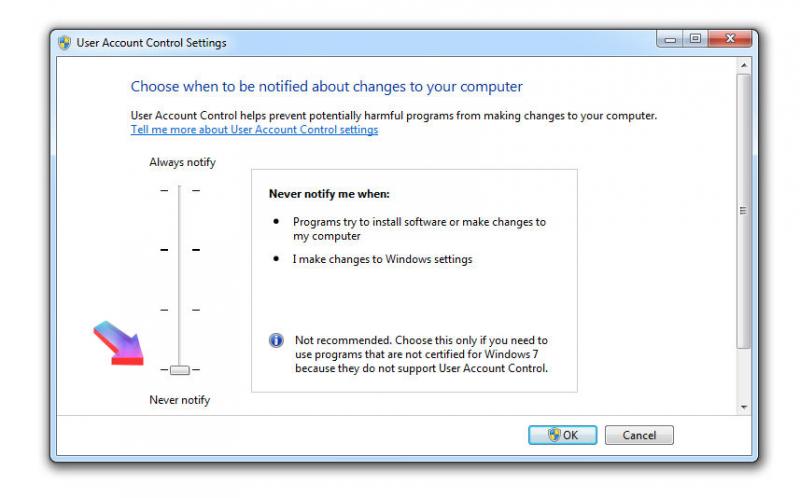
UAC is on by default on Windows 7 machines. Ostensibly to stop malware changing your system files, it gets in the way of doing ANY changes within the Program files folder and its sub-folders. Disabling UAC will not make you computer instantly vulnerable and, in the vast majority of cases, provides no more protection than a decent firewall and anti-virus sofware. If you leave UAC enabled, you will need to deal with messages such as this - even if you ARE the Administrator:

Ok, let's start. Click Start | Control Panel | User Accounts and Family Safety | User Accounts | Change User Account Control Settings. Drag the slider all the way down to the bottom.
Click OK, OK. A restart message will appear.
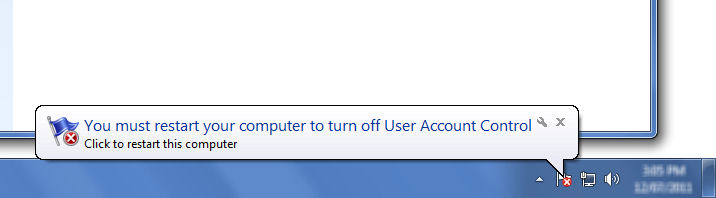
Restart the computer.
I assume you know how to, and have performed a recent backup of your openVPMS system using MySQL Administrator.
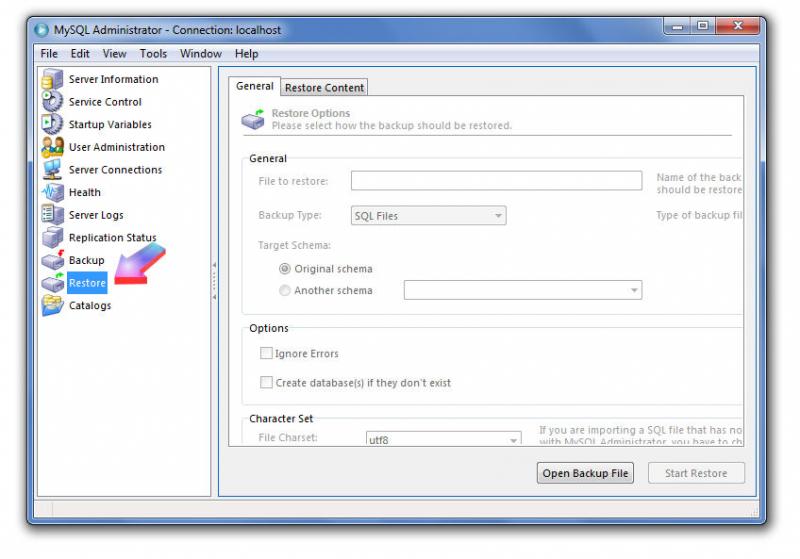
Start MySQL Administrator and select Restore from the menu option at left.
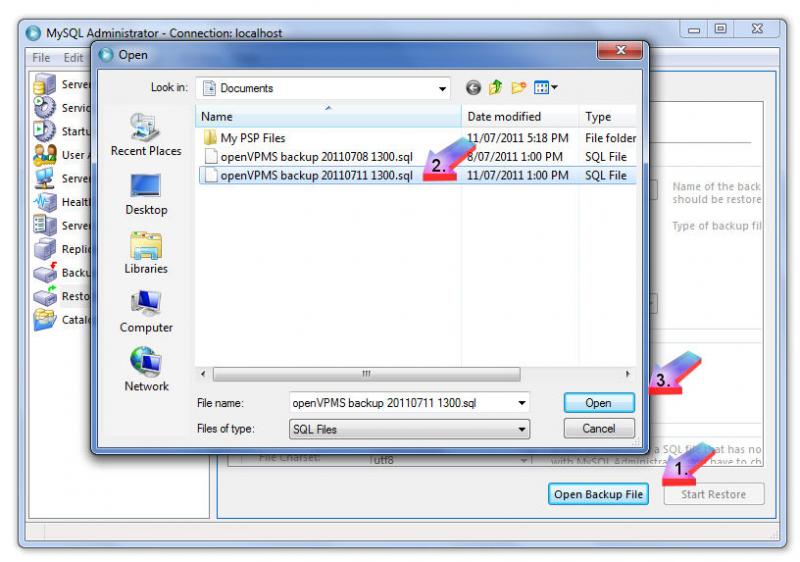
Click Open Backup File (1), select your file (2), and click Open (3):
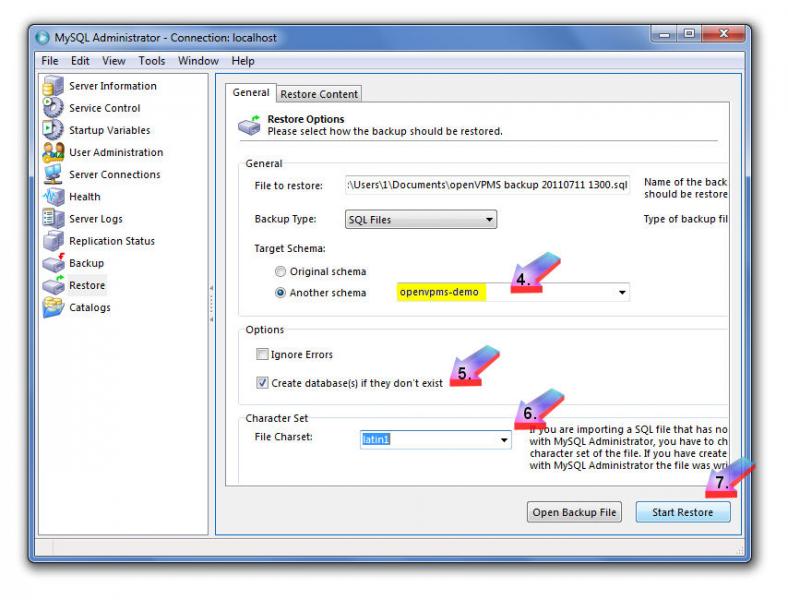
Click on Another schema and type in openvpms-demo (4), check Create database.. (5), select File Charset of latin1 (6) and click Start Restore (7):
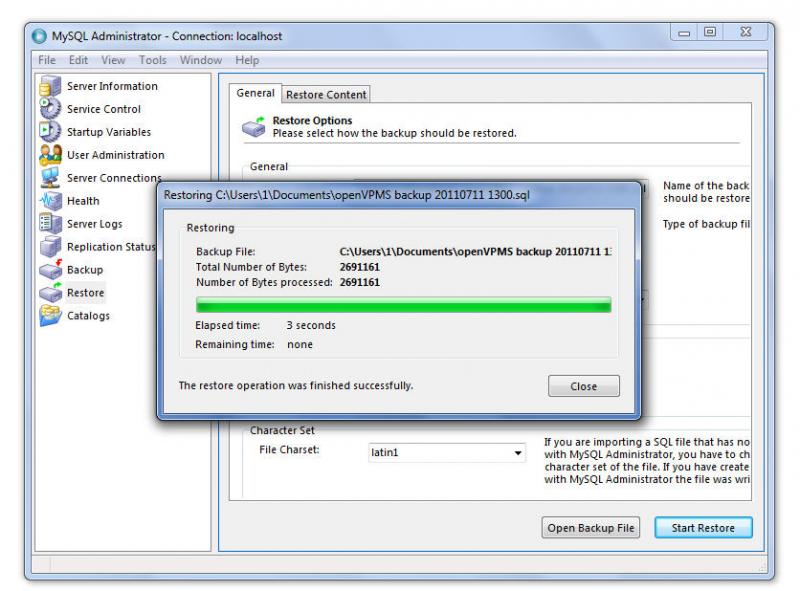
Once the operation is complete, click Close and exit MySQL Administrator.
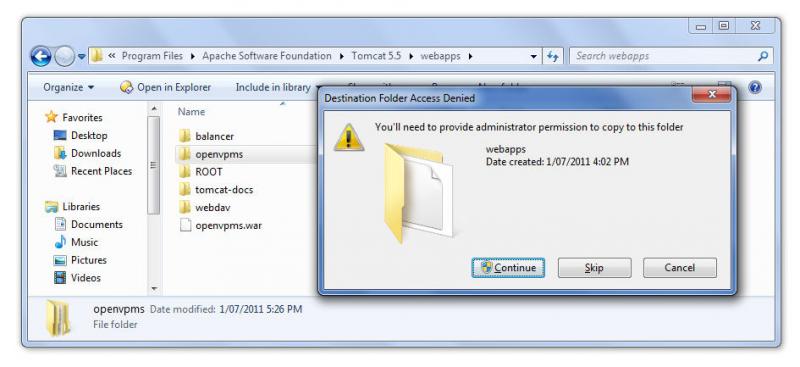
Open Computer, browse to C:\Program Files\Apache Software Foundation\Tomcat n.n\webapps (n.n is your version number). Click on openvpms folder and press Ctrl-C then Ctrl-V. You may see an Administrator message. Click Continue.
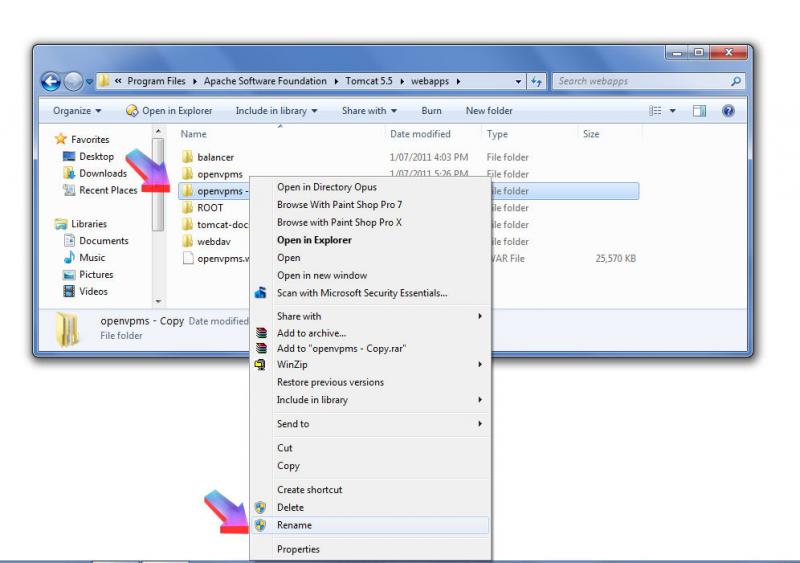
Right-click on openvpms - copy, select Rename and rename folder to openvpms-demo:
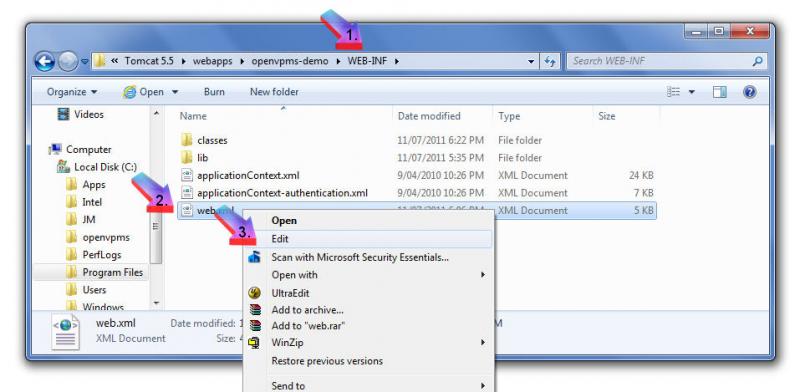
In Explorer, browse to browse to C:\Program Files\Apache Software Foundation\Tomcat n.n\webapps\openvpms-demo\WEB-INF folder (1), right-click on web.xml (2) and select Edit (3).
The file will open in Notepad.exe. Near the top of the file (lines 10-13) you will see this block of text:
<context-param>
<param-name>webAppRootKey</param-name>
<param-value>openvpms</param-value>
</context-param>
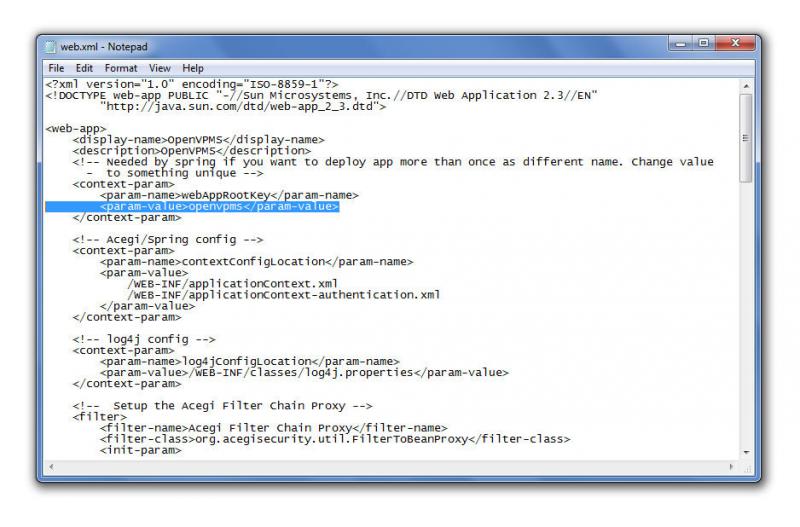
Change the openvpms in the highlighted line to read openvpms-demo, thus:
<param-value>openvpms-demo</param-value>
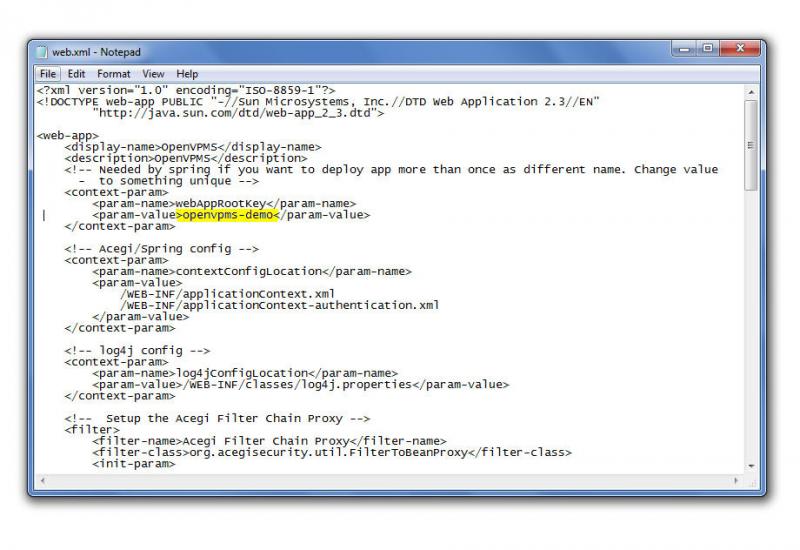
Save and close the file.
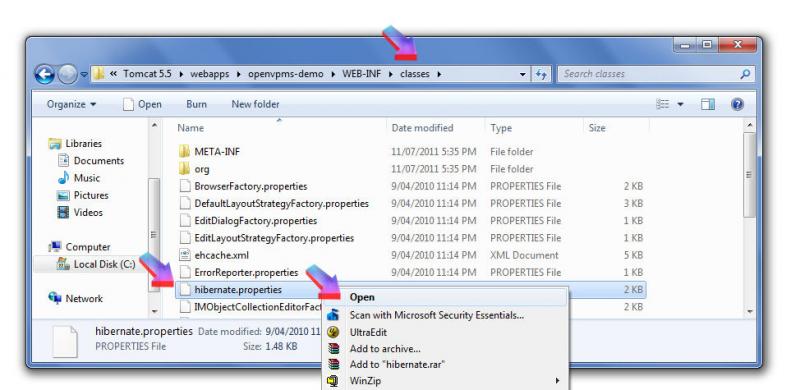
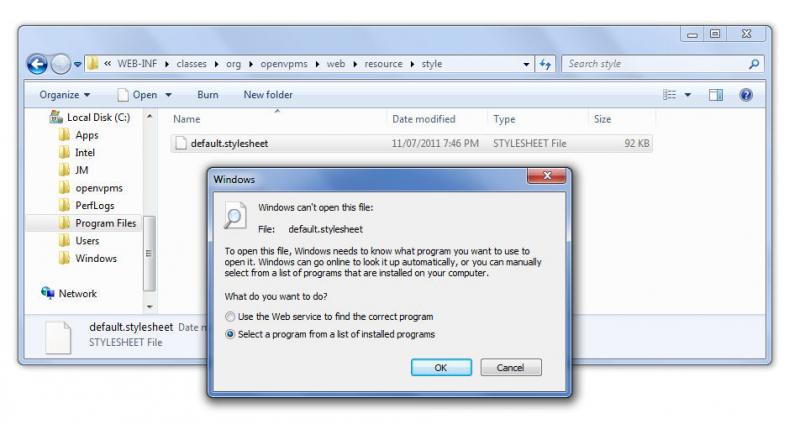
Still in Explorer, browse to the classes folder. Right-click on hibernate.properties and select Open:
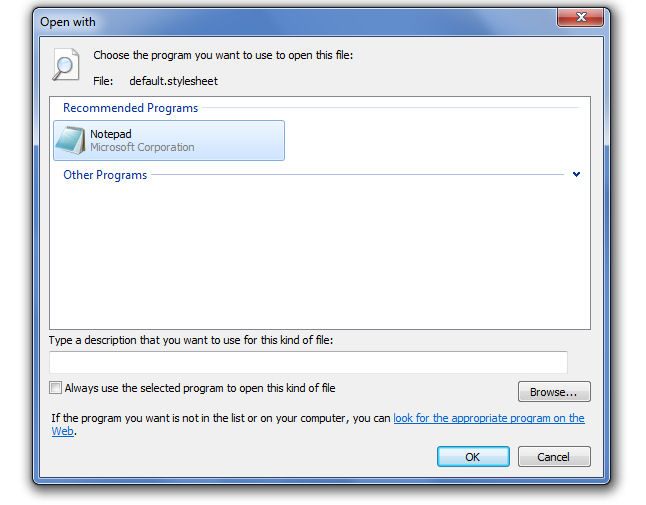
Click on Select a program..... and press OK:
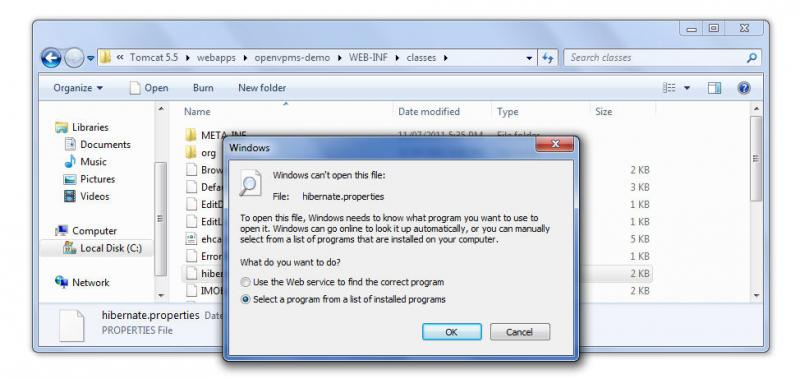
Select Notepad, un-check Always use ..... and click OK:

Look for the line hibernate.connection.url=jdbc:mysql://localhost:3306/openvpms
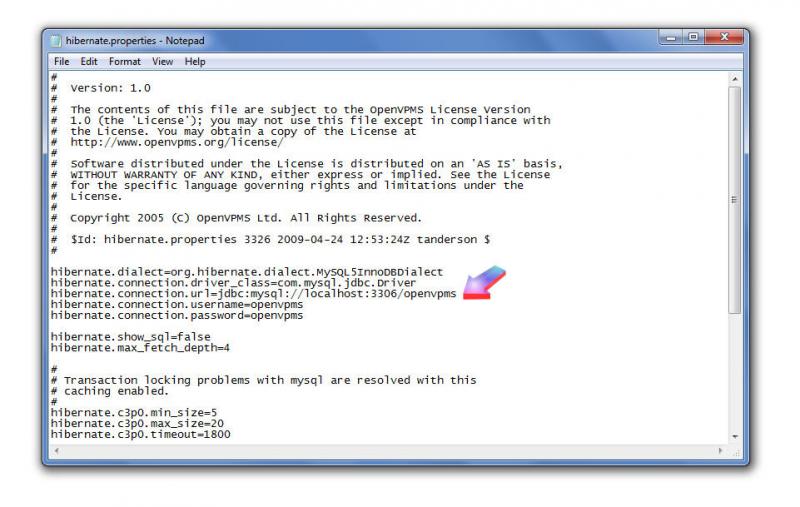
and change to
hibernate.connection.url=jdbc:mysql://localhost:3306/openvpms-demo
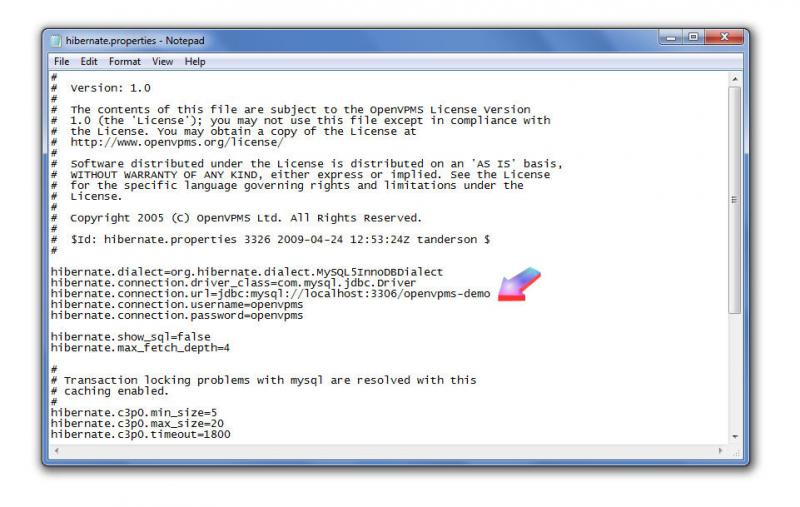
Save and close the file.
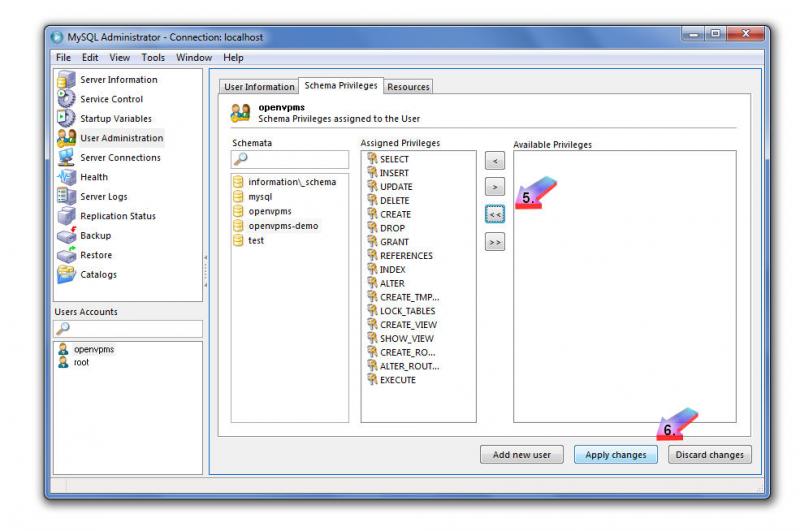
Start MySQL Administrator, log in and click on User Administration (1). Click on Schema Privileges tab (2), click on openvpms (3) and click on openvpms-demo (4):
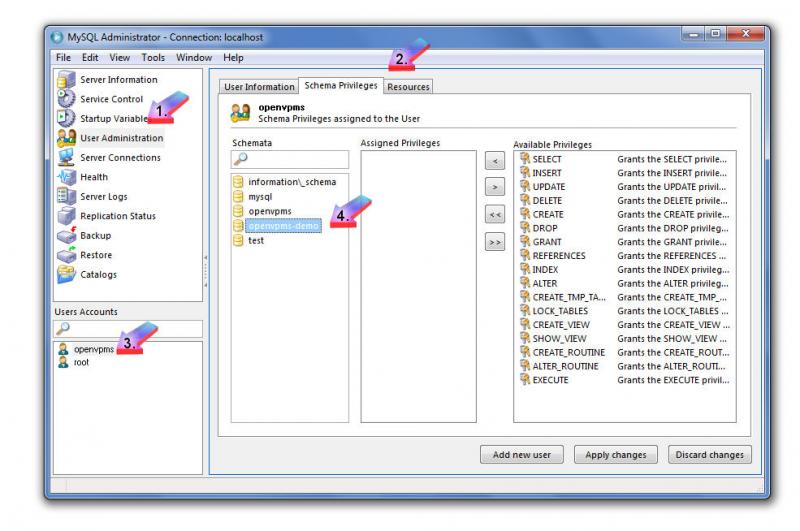
Click on double left arrows (5), then click on Apply Changes (6):
Close MySQL Administrator.
You'll want to change the background colour to orange so that you and your staff will know whether you're working in the real thing (green) or the demo/training version (orange).
Browse to C:\Program Files\Apache Software Foundation\Tomcat n.n\webapps\openvpms-demo\WEB-INF\classes\org\openvpms\web\resource\style folder. Right-click ob default.stylesheet and select Edit.
Select Notepad, un-check Always use .... and click OK:
Press Ctrl-H (or Edit | Replace) and change 339933 to FF9900, selecting Replace All.

Save and close the file.
Restart your computer.
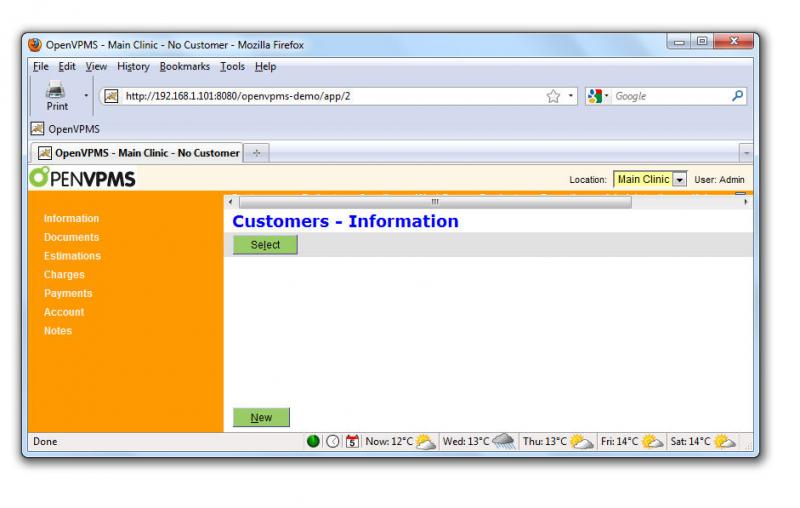
Open Firefox and type in http://localhost:8080/openvpms-demo/app. Log in as admin/admin and you should have openVPMS in orange ready for you to use for training.
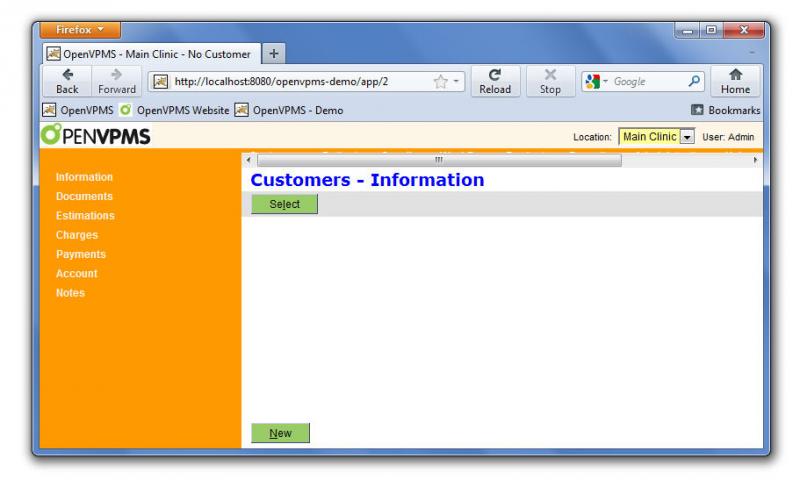
To start OpenVPMS-demo on another PC on the network, you will need to type in http://IPv4_address:8080/openvpms-demo; in example below, http://192.168.1.101:8080/openvpms-demo:
Hope this helps.
Created 20 July 2011 (Author: Yuri Sos)


